Introduction
Integrating Salesforce Marketing Cloud with Salesforce provides a seamless way to enhance marketing automation, streamline operations, and improve customer engagement. This integration, often referred to as Marketing Cloud Connect, allows businesses to synchronize Salesforce data with Marketing Cloud for more personalized and effective campaigns. In this article, we’ll walk you through the steps to connect Marketing Cloud with Salesforce, add custom fields to the Contact Object, and sync the data to Marketing Cloud for improved marketing cloud integration. Whether you are looking for Salesforce Marketing Cloud data or just want to understand how Marketing Cloud Connect Salesforce works, this guide has got you covered. Discover how Salesforce Marketing Cloud can transform your campaigns here.
Without further a due let’s dive in.
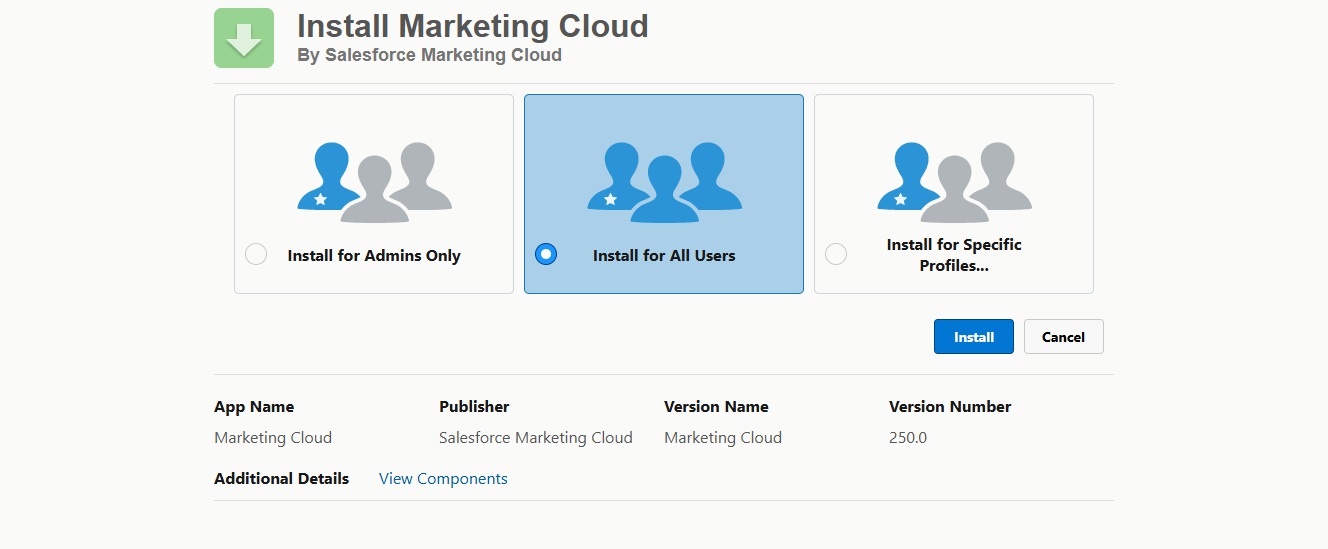
Install Marketing Cloud Connect
- Log in to Salesforce Org.
- Get the latest version of the Marketing Cloud Connect package here. Link
- Click on the Production Org link, and log in with your Salesforce credentials.
- Select Install for All Users and Click Install.
- Grant access to third-party websites, if prompted, and click Continue.
- The package will likely say it is taking too long to install and will send you an email when it completes.
- Once you receive confirmation that the installation has completed move on to the next steps.
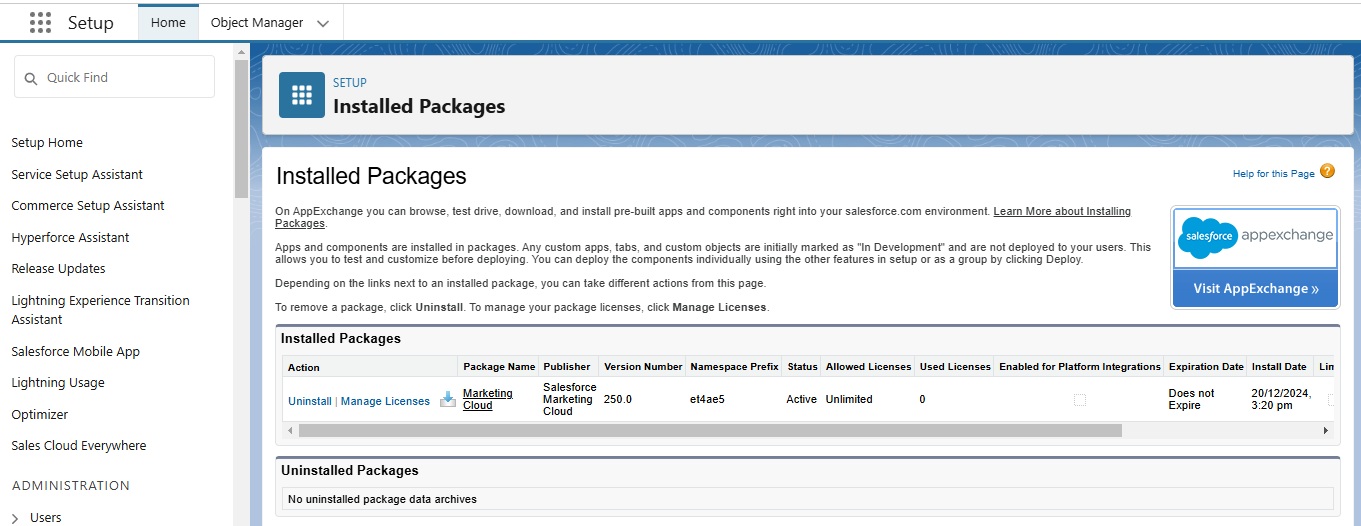
- After installing go to installed packages and verify that you have the most up to date package as reflected on the Install Managed Package page.

Update User Page Layout
- In the Sales/Service Cloud, hover over the gear icon at the top right of the screen and select Setup.
- In the setup screen click on the Object Manager button in the top left of the screen.
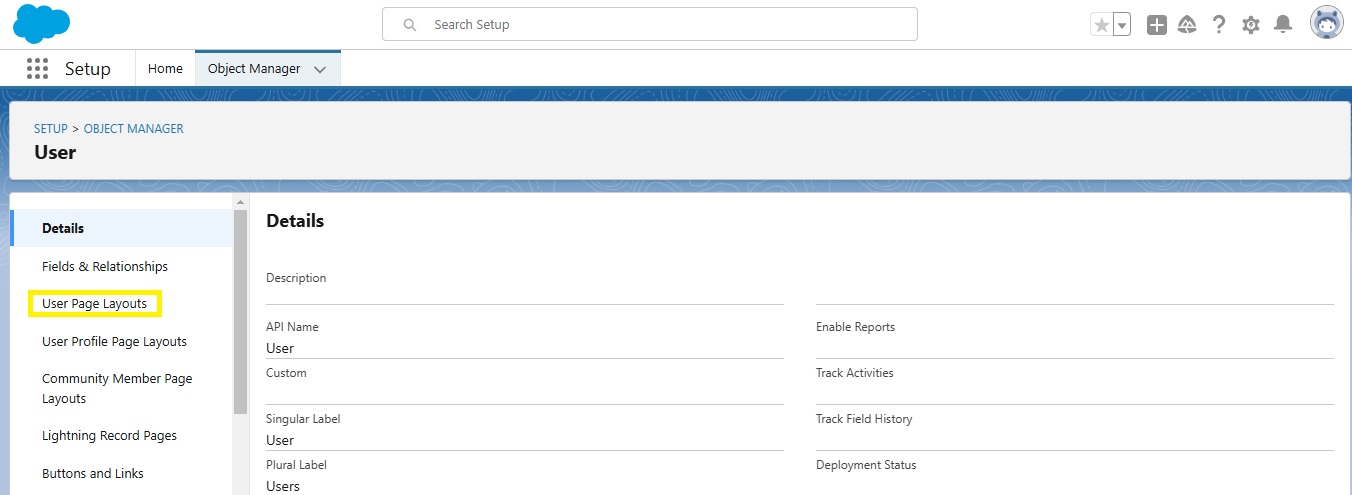
- Search for user and click on the User object.
- On the left of the screen select User Page Layouts.
- Select User Layout.
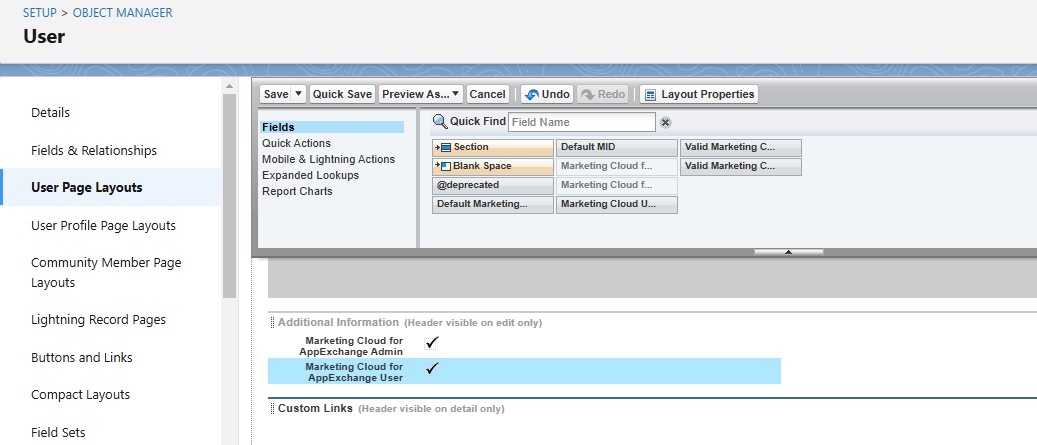
- Scroll to the Additional Information section of the Layout setup.
- Drag Marketing Cloud for AppExchange Admin to the Additional Information section.
- Drag Marketing Cloud for AppExchange User to Additional Information.
- click Save.
Assigning Permissions to your SF User
- Go to Home, Click Users, When the menu expands click Users in the menu.
- Locate your user and click Edit.
- Scroll to the Additional Information section and check the boxes for Marketing Cloud for AppExchange Admin and Marketing Cloud for AppExchange User.
- Click Save.
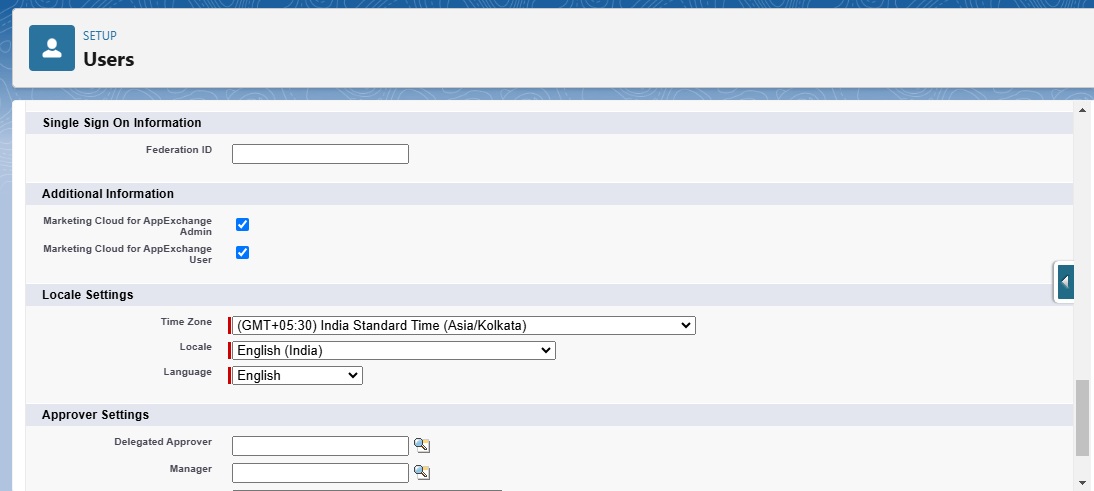
Note: We can create the User Groups in our Salesforce Org. That will apply all these permissions to every user in the group.
Configure your Marketing Cloud Connector
- In a fresh browser or incognito window log into both your Sales/Service Cloud org and Salesforce Marketing Cloud Engagement accounts.
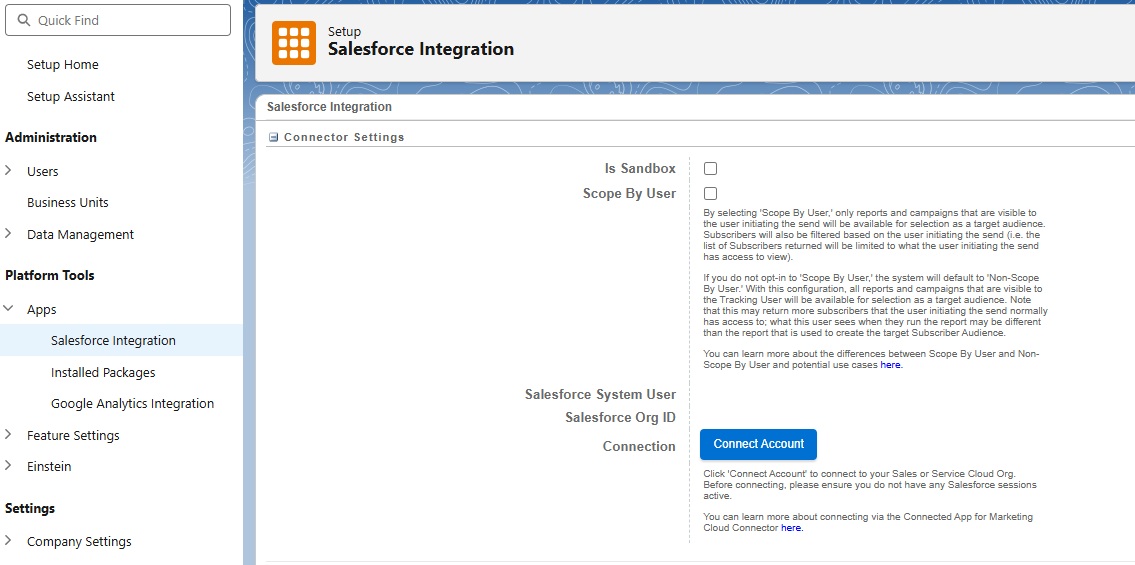
- In Salesforce Marketing Cloud Engagement, Navigate to Setup. In Platform Tools expand Apps.
- Click on Salesforce Integration and then Click Connect Account.
- If prompted to click OK to connect the account do so.
- Give Sales/Service Cloud Username and Password and click login.
- When prompted click Allow to grant access for your SDO user to access the Marketing Cloud account.
- Verify the account is the Sales/Service Cloud Org which you want to connect.
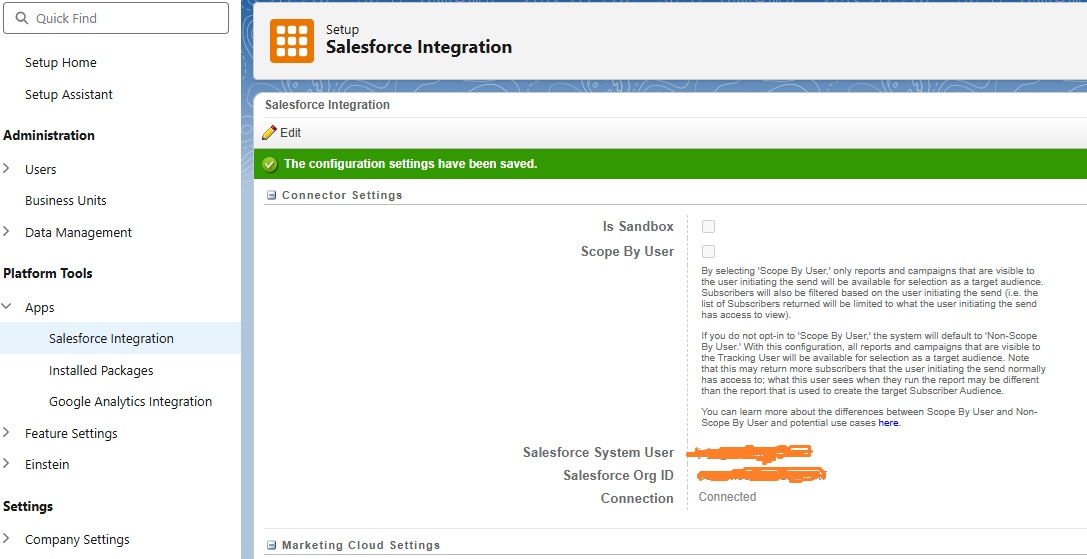
Note: If you get a error across the top of your screen during this step verify that you don’t have additional Salesforce orgs open in your browser. Closing the tab does not ensure you are logged out.
Configure Connected App
- In the Sales/Service Cloud org, Go to Setup. Use the Quick Find box to locate and open Manage Connected Apps.
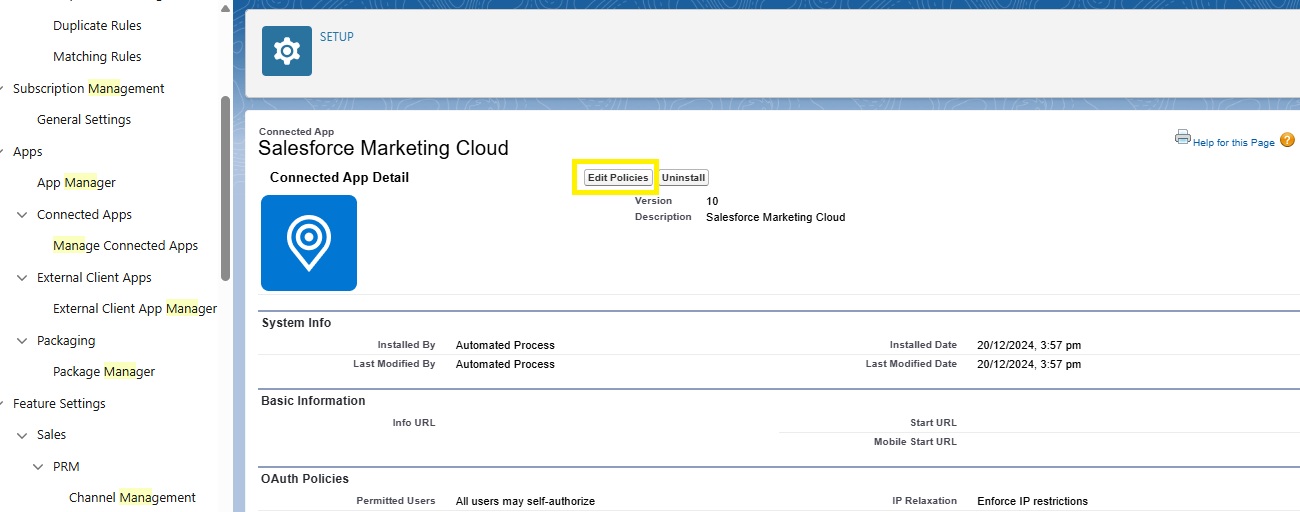
- Click Manage Connected Apps. Click Salesforce Marketing Cloud. Click Edit Policies.
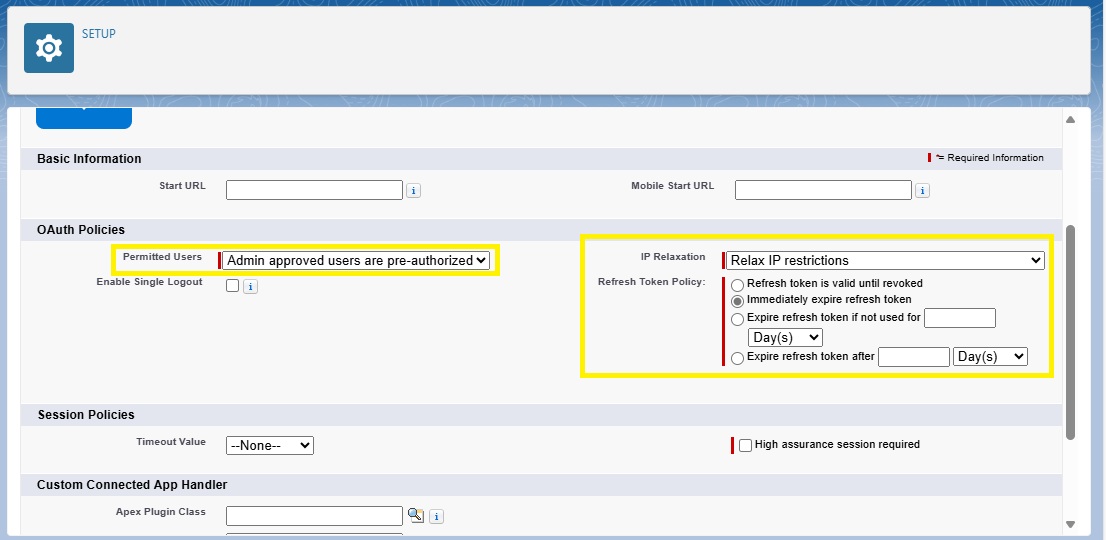
- Under Permitted Users, select Admin approved users are pre-authorized. If a warning message appears, click OK.
- Under IP Relaxation, select Relax IP restrictions.
- Under Refresh Token Policy, select Immediately expire refresh token.
- Click Save.
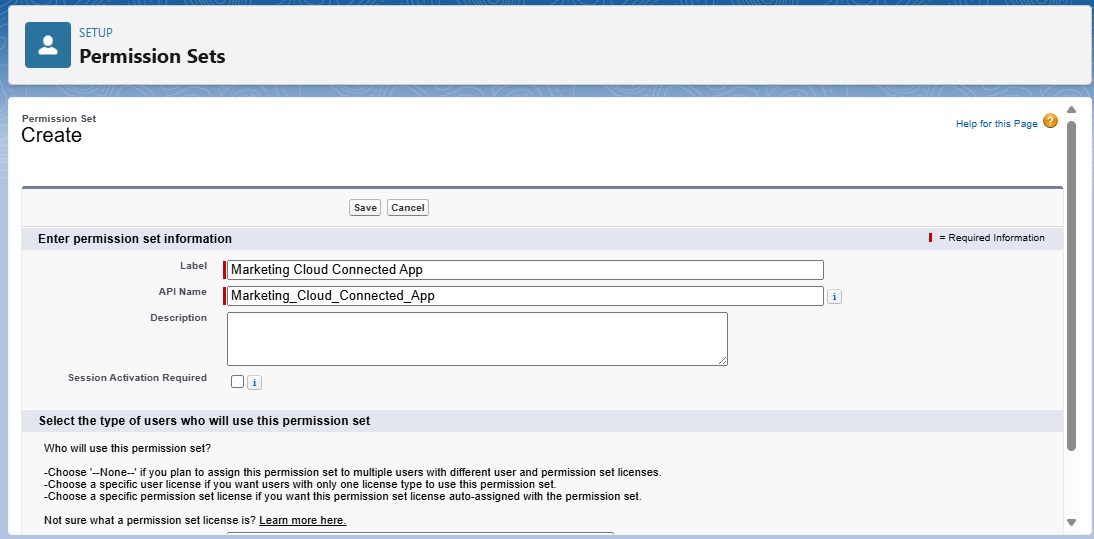
- In Quick Find box search for Permission Sets and click Permission Sets. Click New.
- Give the permission set a memorable name. For example, Marketing Cloud Connected App. Validate the generated API name and ensure that this field contains the desired value. Click Save.
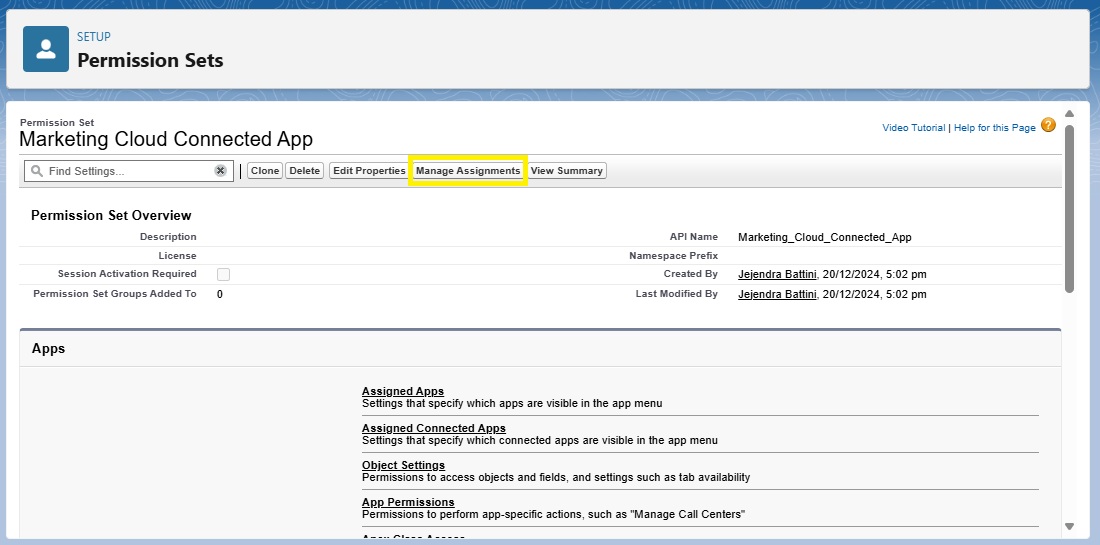
- Click Manage Assignments.
- Click Add Assignments. Select the checkbox for the user you use to log into the Sales/Service Cloud Org. Click Next, Click Assign and then Click Done.
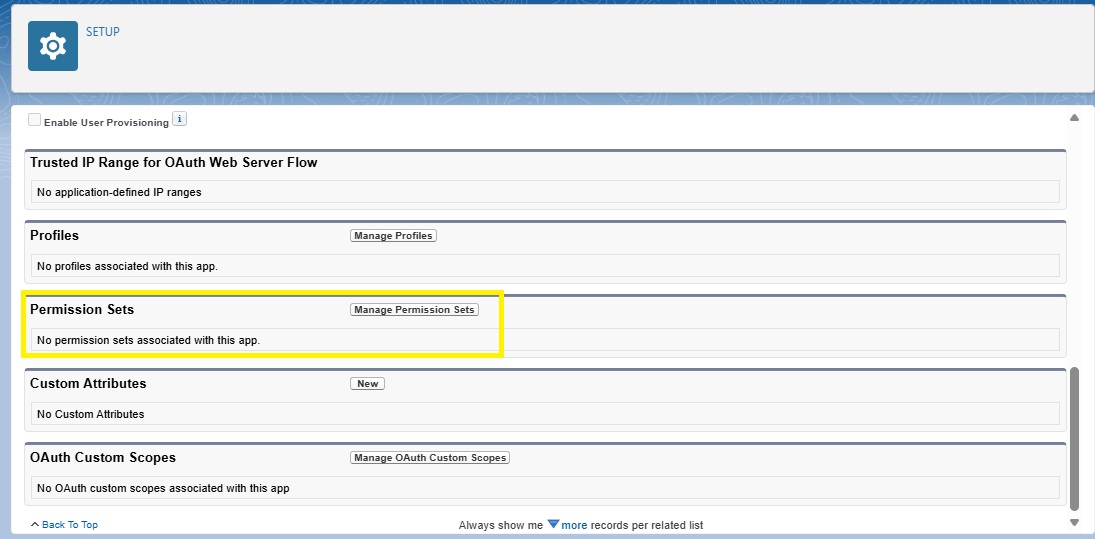
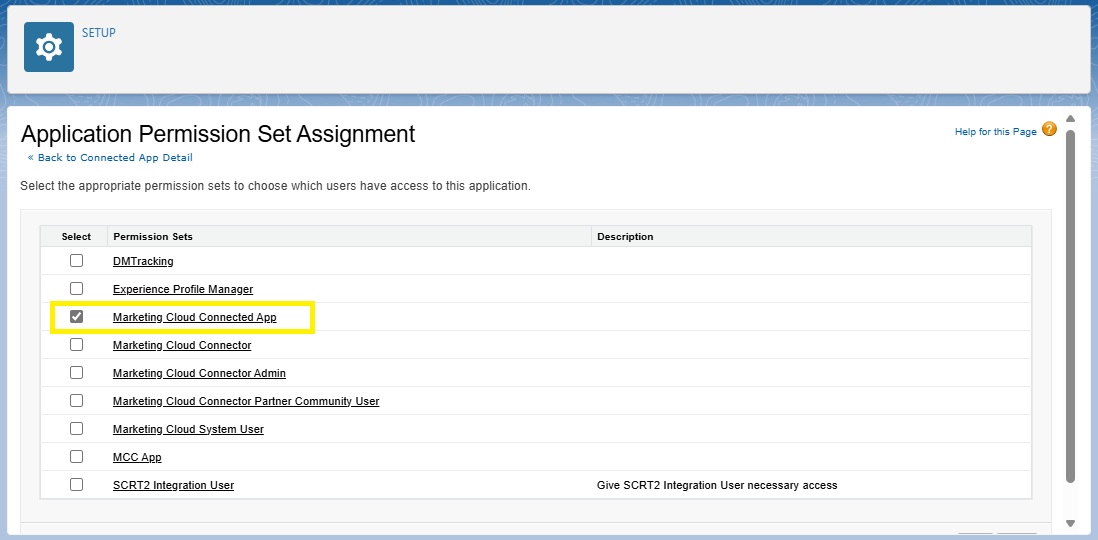
- Go to the Manage Connected Apps screen again. Click Salesforce Marketing Cloud and Click Manage Permission Sets.
- Select the newly created permission set (Marketing Cloud Connected App).
- Click Save.
Connect Marketing Cloud User
- In Salesforce Marketing Cloud, navigate to Setup, In Administration expand Users, Click Users, Click your Marketing Cloud user.
- Make sure that the user you integrate has admin access.
- Click on Integrate in the Salesforce.com Status section.
- Enter your Sales/Service Cloud username, Save the settings.
- The Salesforce.com Status field updates to "Integrated" if the connection is successful.
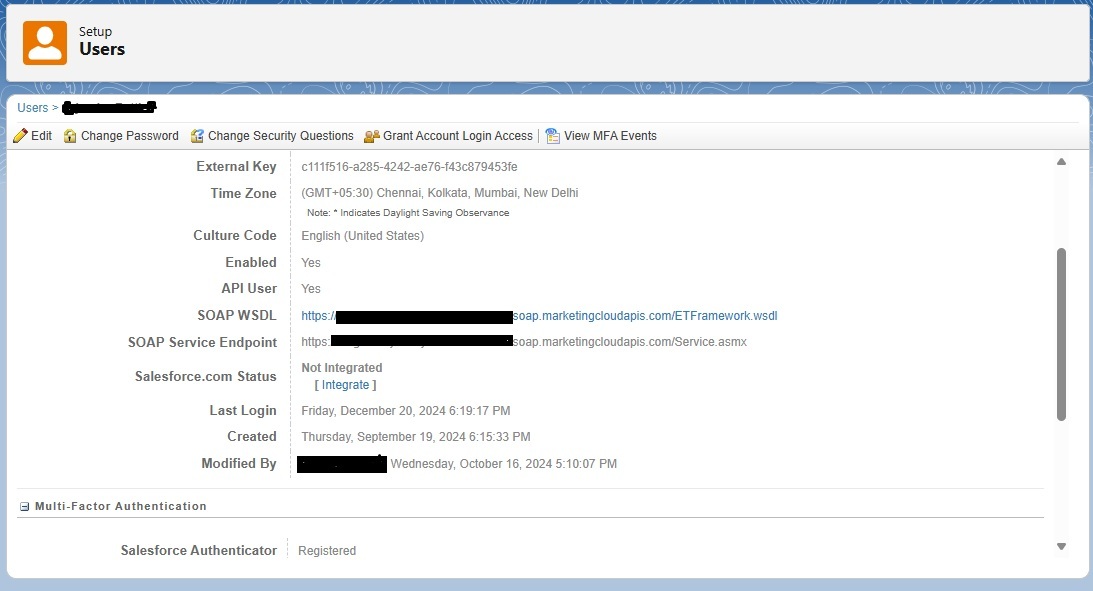

Note: If an error appears that indicates the user is already mapped, verify you don’t have other accounts integrated by using the same user credentials.
Configure the Sales/Service Cloud Org
- Go to Setup in the Sales or Service Cloud.
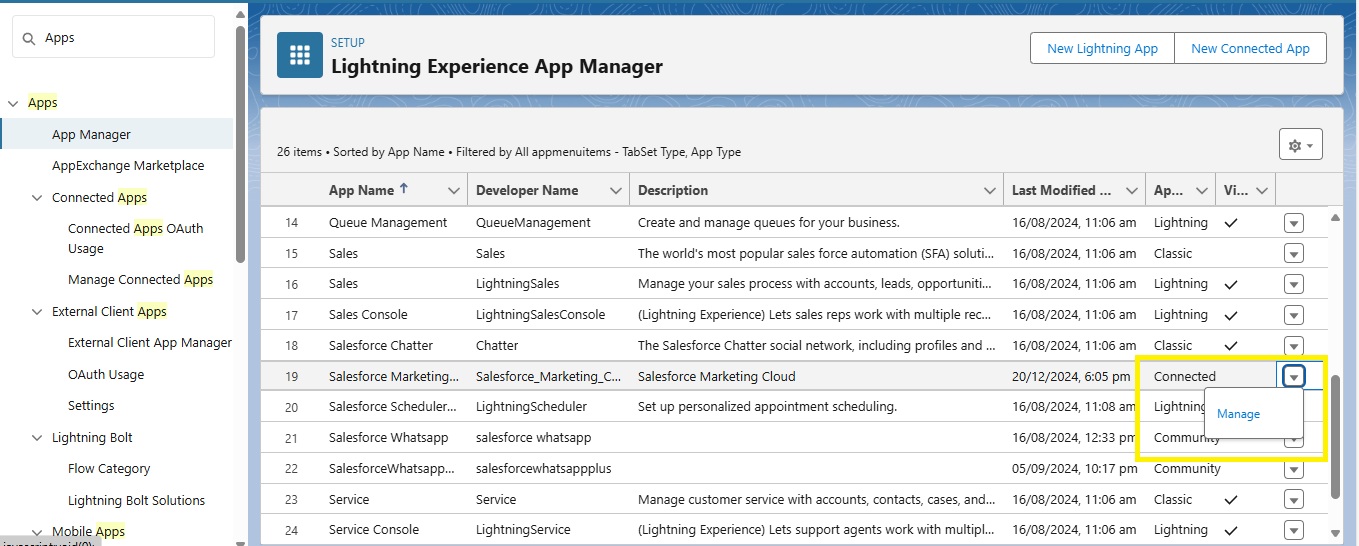
- Under Apps, Select App Manager, Find Salesforce Marketing Cloud in the list, Select the drop-down option on the right and click Manage.
- Click on Edit Policies.
- Select Relax IP restrictions under IP Relaxation. And Save changes.
- Open Session Settings by using quick search. Click Save without making any changes.
Note: If you are using the Classic UI and not Lightning these steps will not be the same. It is suggested that you use the Lightning when configuring the connector.
Launch the Setup Wizard
-
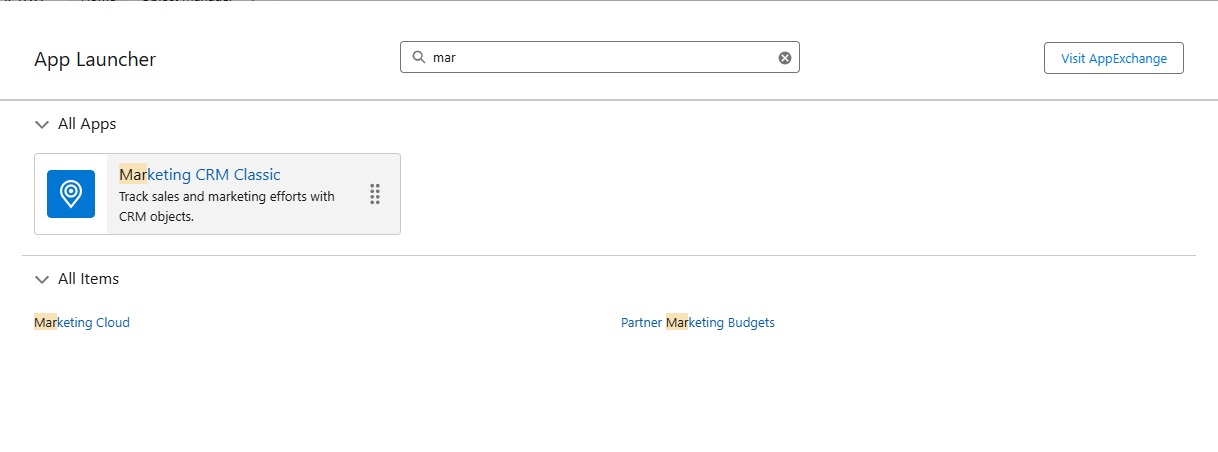
Open the App Switcher and select Marketing Cloud under All
Items.
This link will take a few seconds to launch. - Click Verify Remote Site to verify the Metadata API remote site then Okay.
- Click Start Wizard to begin the Configuration Wizard and follow the steps.
- Check the I agree box and click the Configure Marketing Cloud Connector button.
- If the Configuration Summary returns with all green check marks Click Okay! to continue.

Connect your Salesforce Org to the Marketing Cloud
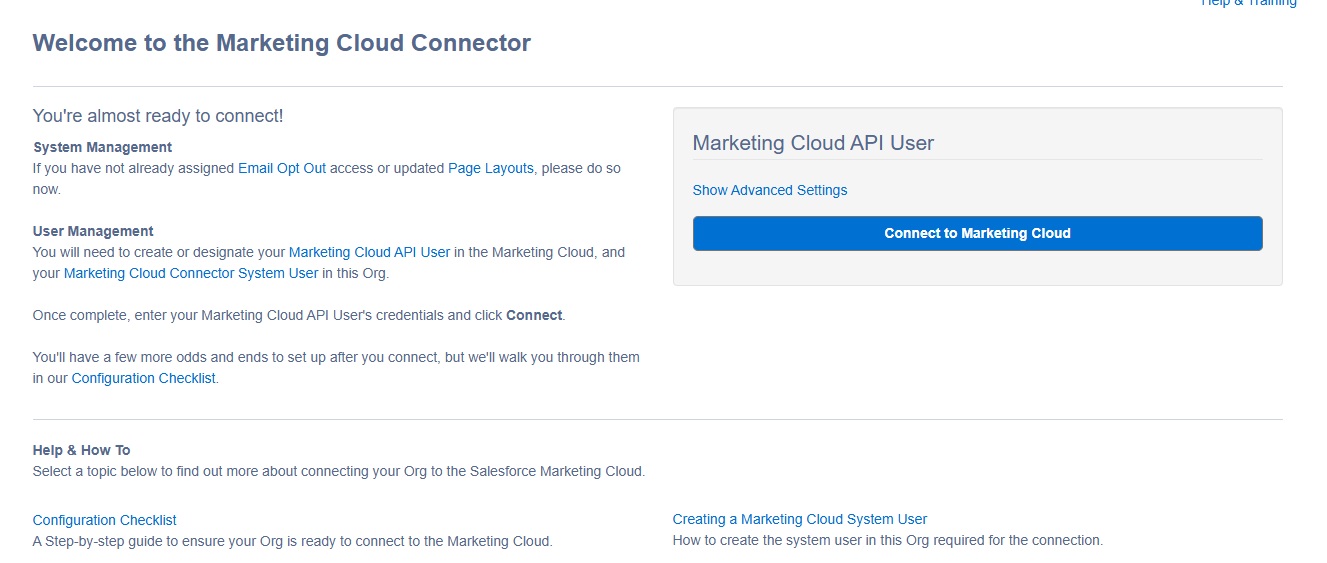
- After the setup is complete you will be taken to a page that has an option to Connect to Marketing Cloud, click.
- Enter your Marketing Cloud credentials it prompted.
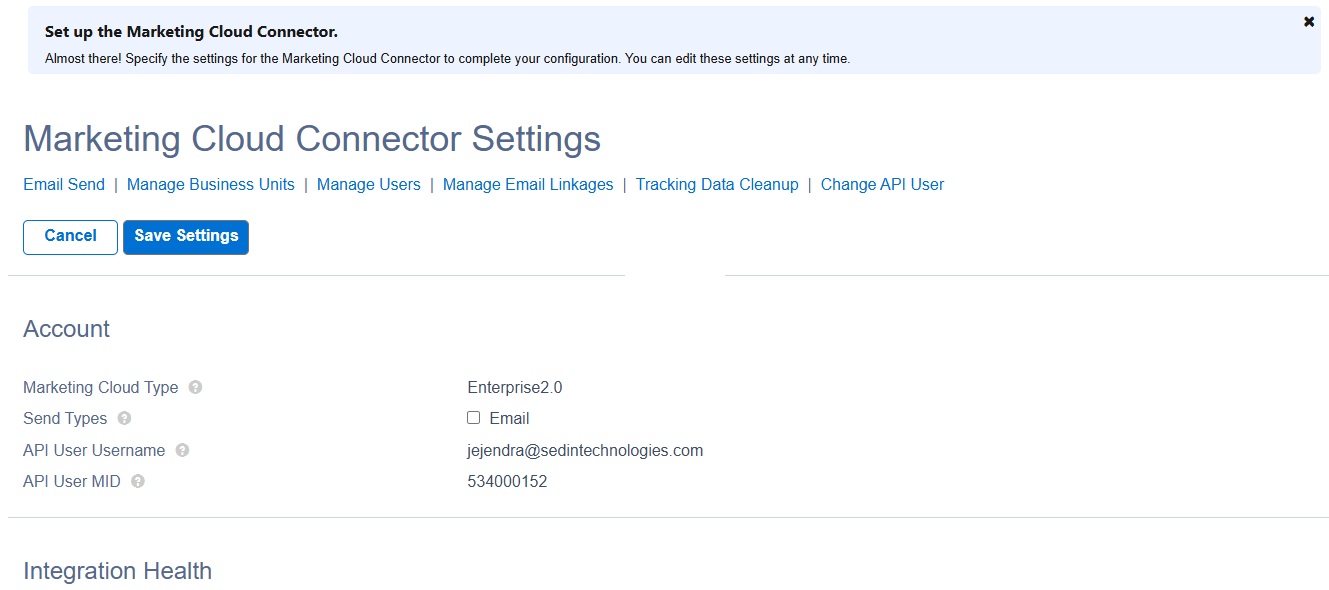
- After this completes you will be directed to a MC Connector Settings page.
- On this page make sure you check Email under Account.
- Check Report and Campaign under sends.
- Enter your email under Support Ticket Recipient under Notifications.
- Check all the boxes for Tracking Detail.
- Click Save Settings.
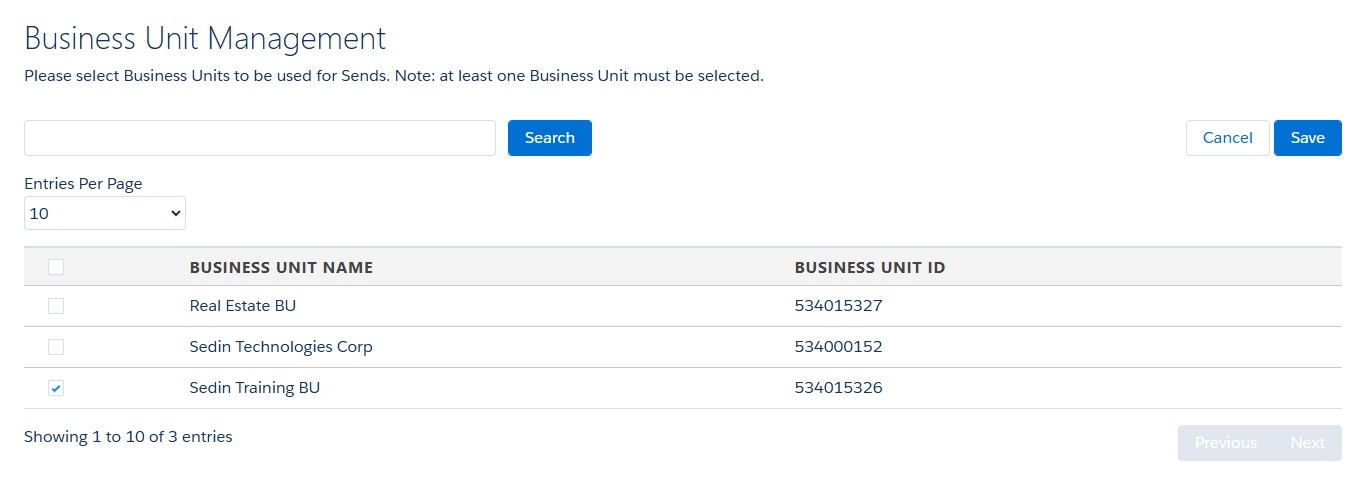
- Your settings will be saved, and you will then be prompted to select the business units you would like to be used for sends.
- Select the business units you want to use and click Save.
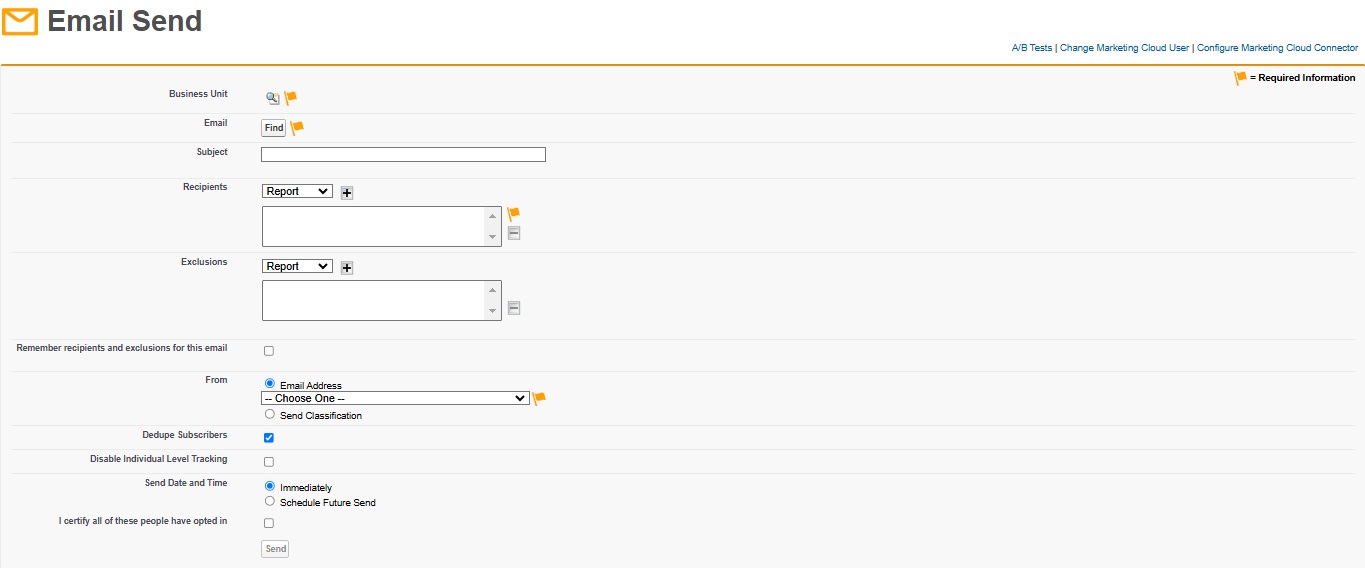
After saving you will be taken back to the MC Connector Settings page. From here select Email Send at the top of the page.
You will be prompted one last time to select the Connect to Marketing Cloud button.
You will now be in the Marketing Cloud email send screen within your Salesforce Org.
Without using Salesforce Marketing Cloud, You can send email to the object reports from Sales/Service Cloud itself.
Create a new field on the Contact Object
- In the Sales or Service cloud, click Setup.
- Once in the setup screen click on the Object Manager button in the top right of the screen.
- Search for contact and click on the Contact object.
- On the left of the screen select Fields & Relationships.
- Click New.
- Select Checkbox, click Next.
- Label, Email_Opt_in, Default Value Unchecked, click Next.
- Click Save.
Create a new Contact in Salesforce Org: Create a contact with required details.
Configure Data Sync in Salesforce Marketing Cloud
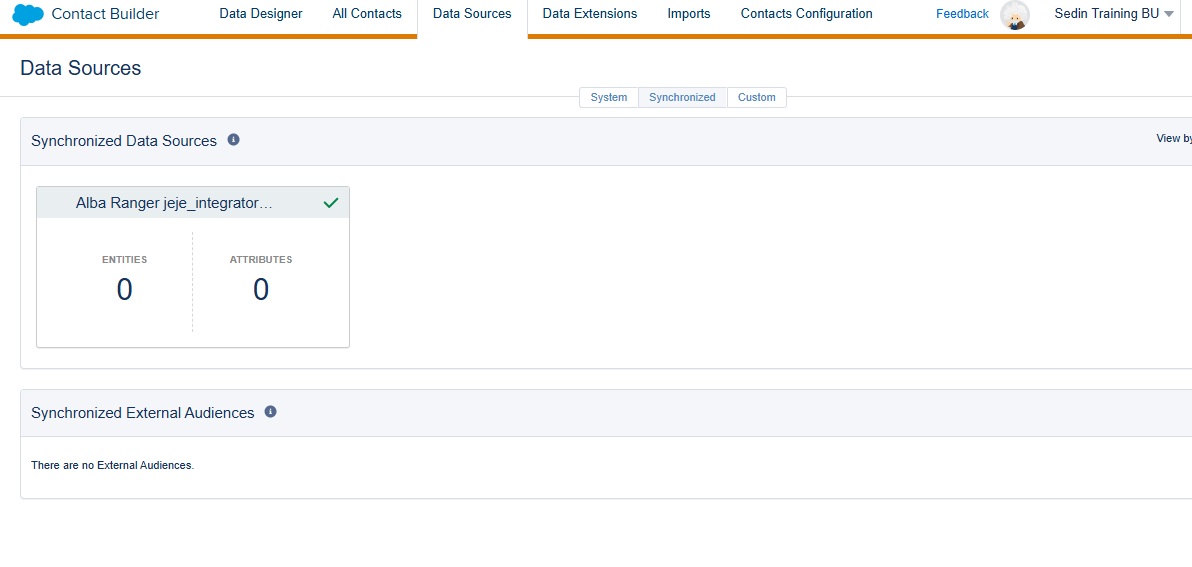
- In Salesforce Marketing Cloud, navigate to Audience Builder > Contact Builder > Data Sources, Select Synchronized.
- It should say Entities 0 and Attributes 0.
- Click on Salesforce box.
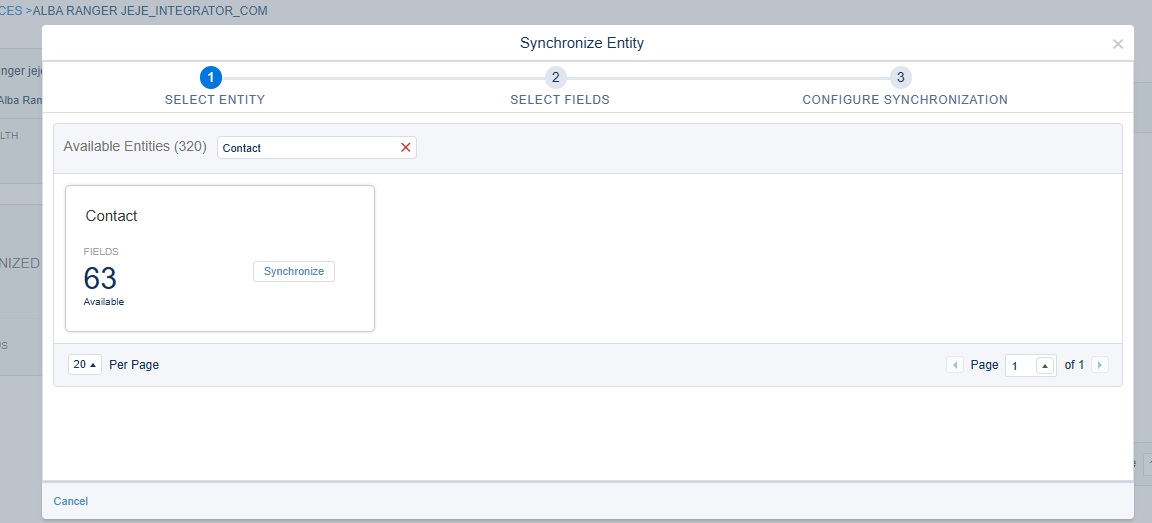
- In the upper right corner click on + Set Up Object.
- Search for Contact and Select Synchronize on the Contact Object.
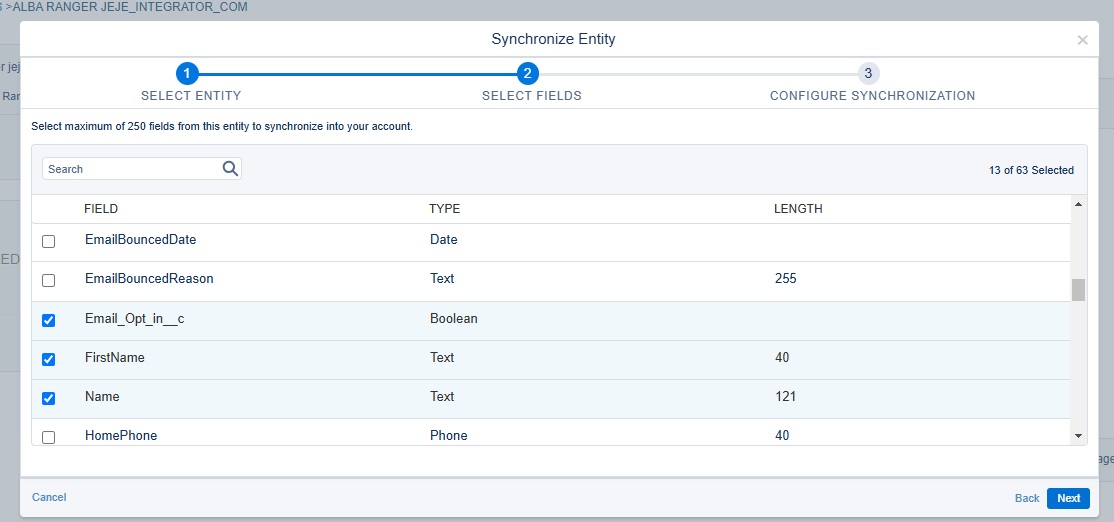
- Some fields will be checked automatically. Check the required fields to be synched. Click Next.
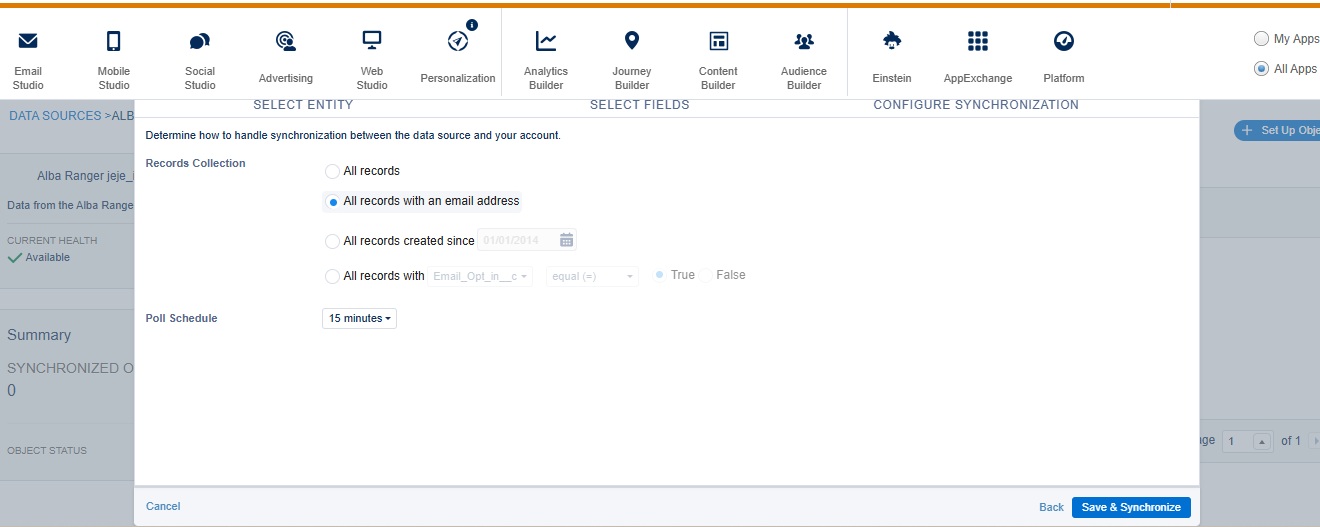
- Select all records with an email address. Leave at 15 minutes for Poll Schedule.
- Click Save & Synchronize. And then Click OK.
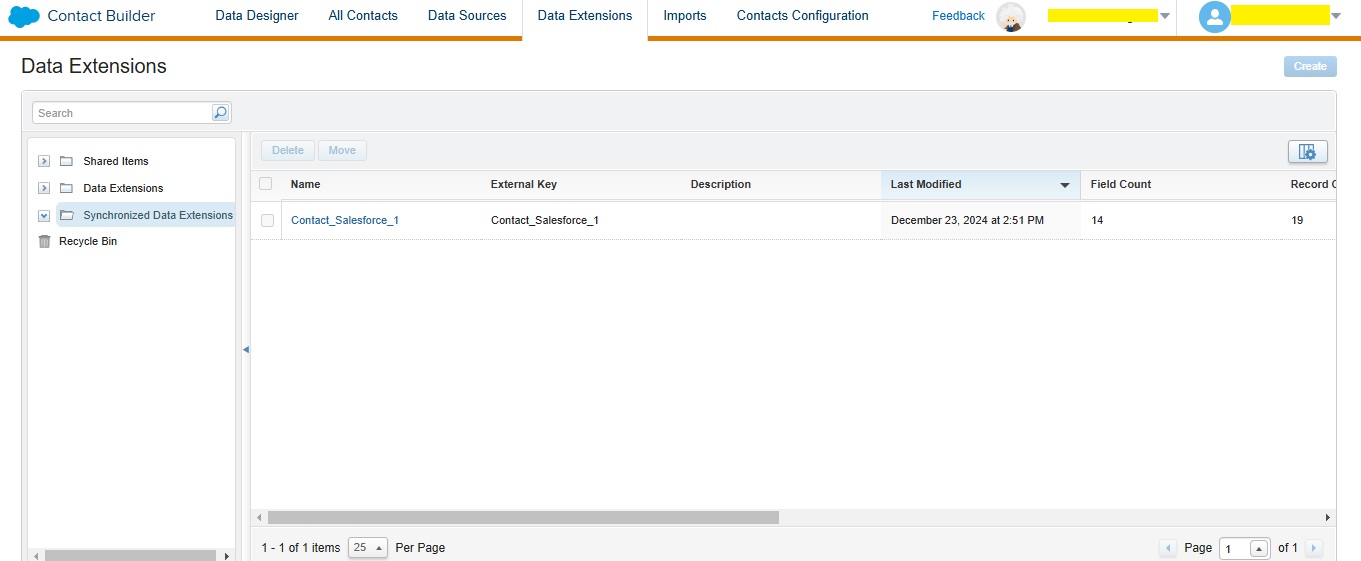
- We can see the contacts are populating. It will take a few moments to sync the object. Once the sync is complete, we can find synchronized data extension under Data Extensions > Synchronized Data Extensions.
Conclusion
Integrating Salesforce with Marketing Cloud enables businesses to streamline marketing operations, automate campaigns, and enhance customer engagement through real-time data synchronization. By following these steps, you'll have Marketing Cloud and Salesforce fully integrated, allowing for seamless communication and powerful marketing automation. Ready to level up your marketing game? Get your consultation with Salesforce Expert!
