Introduction
Managing large volumes of data in digital marketing is no small feat. With data flowing in from multiple sources—think customer interactions, email engagement metrics, purchase behaviors, and more—marketing teams are constantly challenged to keep this information organized, secure, and accessible for timely, impactful campaigns. Manually handling and transferring this data is time-consuming and leaves too much room for error, which could ultimately affect the accuracy and relevance of marketing initiatives.
For teams leveraging Salesforce Marketing Cloud (SFMC), this is where FTP (File Transfer Protocol) setup comes in as a critical solution. By setting up FTP accounts, marketers can automate file transfers, streamline data imports and exports, and secure data flow between systems. With Salesforce Marketing Cloud’s FTP integration, you can manage data more efficiently, enabling faster response times and greater control over data workflows—especially when it involves large datasets.
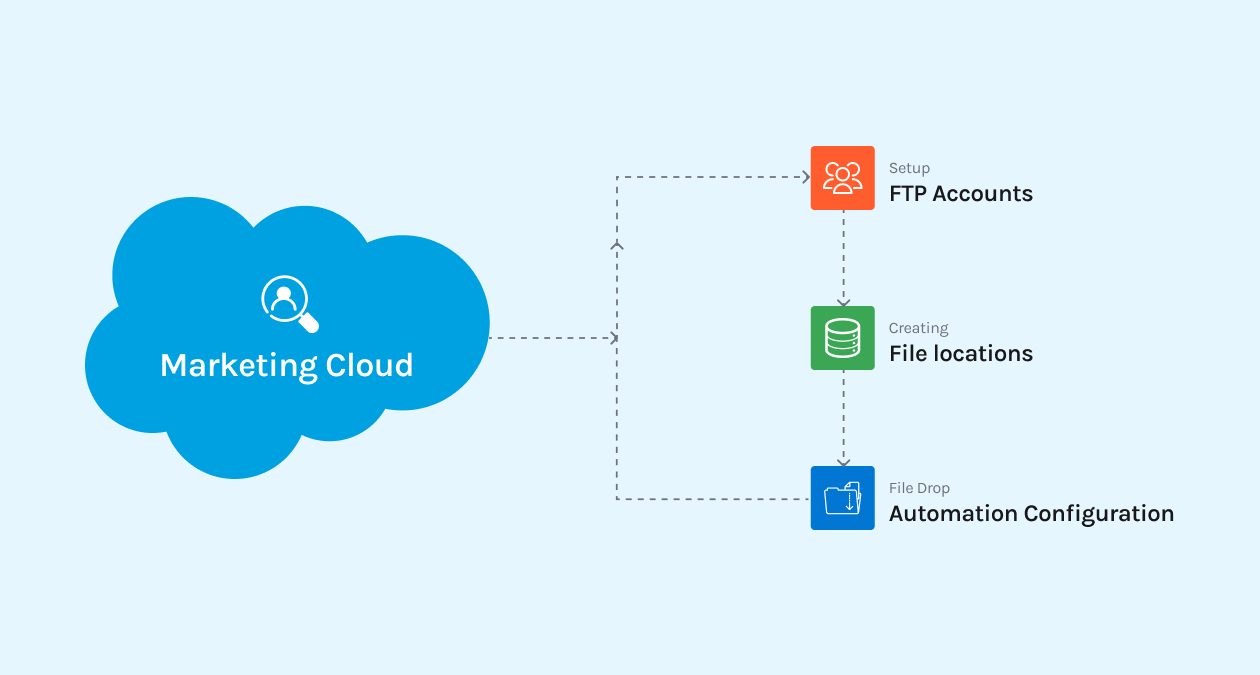
In this blog, we’ll cover everything you need to know about setting up an FTP account in Salesforce Marketing Cloud, creating file locations, and configuring file drop automation. By the end, you'll be equipped to optimize your data management workflows, reduce manual work, and improve the efficiency of your campaigns through secure and automated data transfers. Let’s dive in.
FTP Account Setup, Creating File Locations and File Drop Automation configuration in Salesforce Marketing Cloud
Objective : Import data into Data Extension from FTP as soon as the file is dropped in the respective FTP folder
Step 1. Set Up FTP Account
A File Transfer Protocol (FTP) is a standard protocol for securely moving files between environments. Before you can officially move into Marketing Cloud Engagement and begin creating imports, you need to set up any FTP accounts that you’ll be using. Each Marketing Cloud Engagement account comes with a Secure FTP (or SFTP) that needs to be configured before you do any import activities.
You can have one SFTP per Enterprise account or separate SFTPs for each child account or Member ID (MID).
Here’s how to get your Marketing Cloud Engagement SFTP set up.
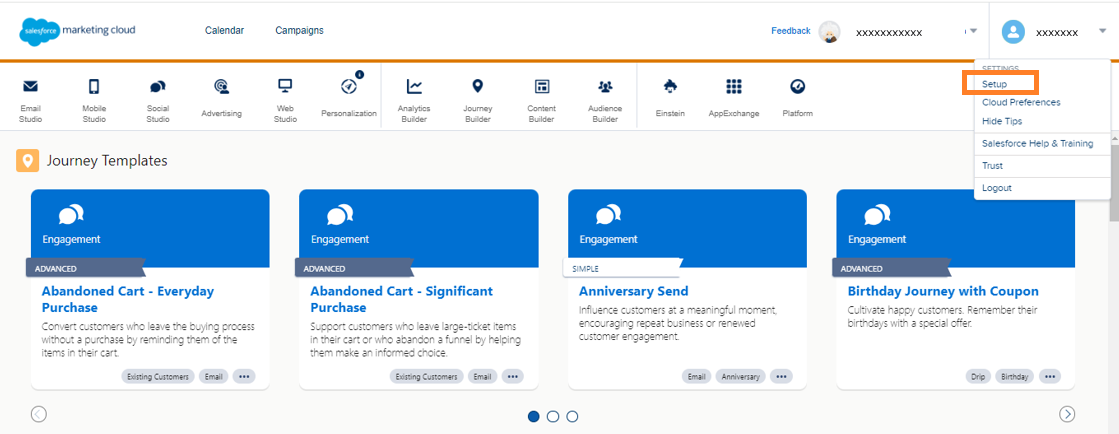
- Log into Salesforce Marketing Cloud Account. Navigate to Setup.
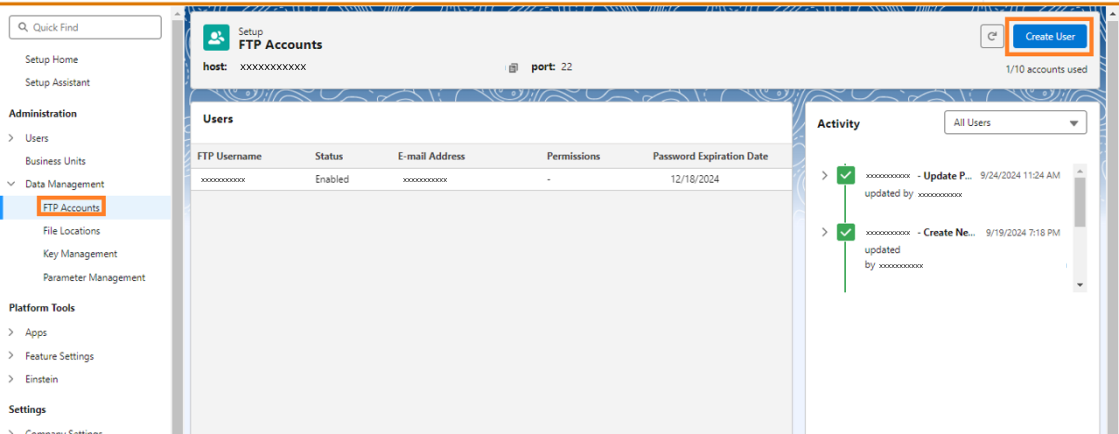
- Navigate to the Data Management, FTP Accounts
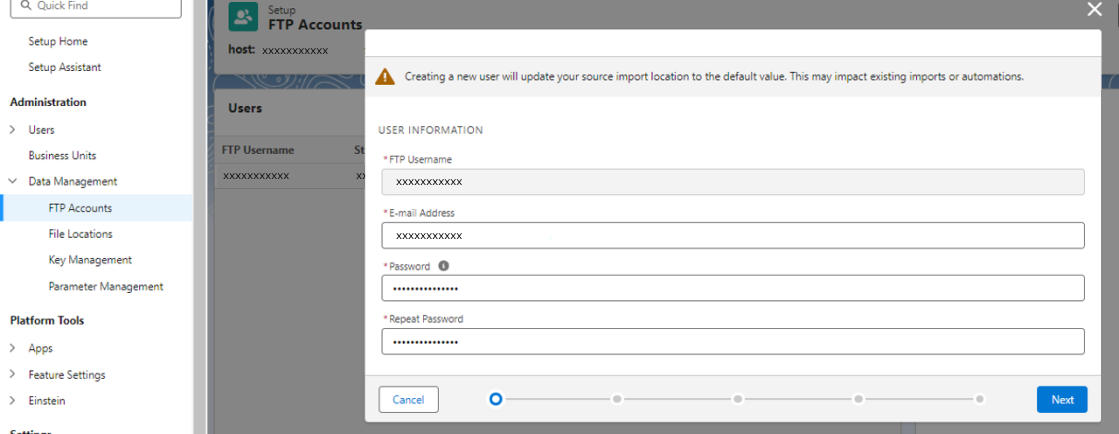
- Click Create User and give E-Mail Address and Password.
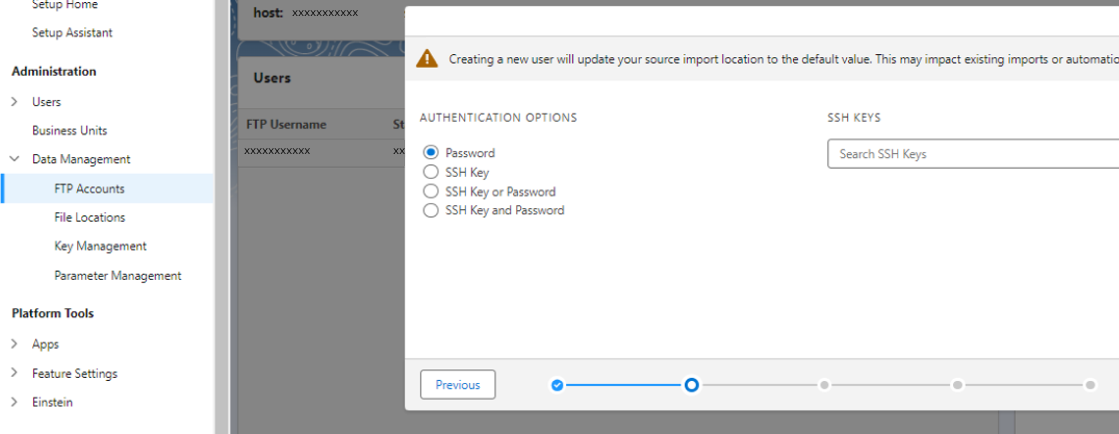
- Click Next, Select Authentication Options as Password. And then click Next
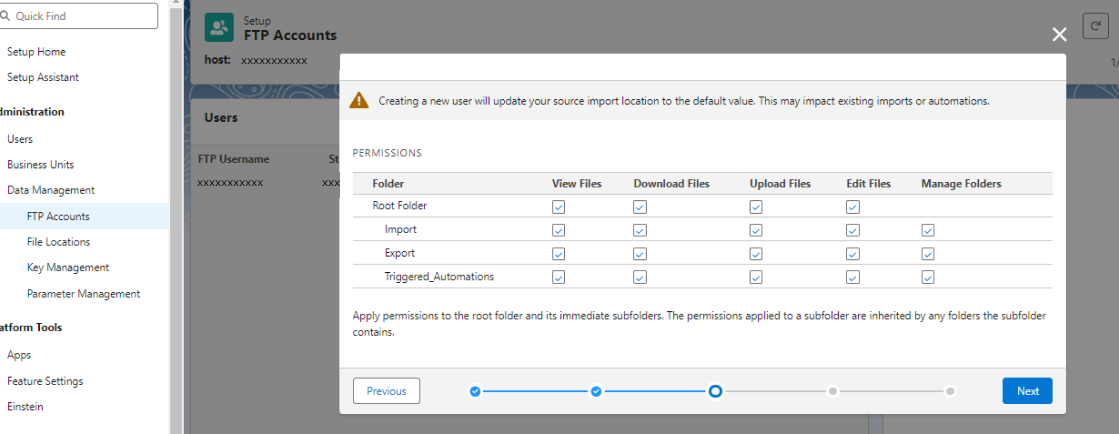
- Apply permissions to the root folder and its immediate subfolders. The permissions applied to a subfolder are inherited by any folders the subfolder contains. Click Next.
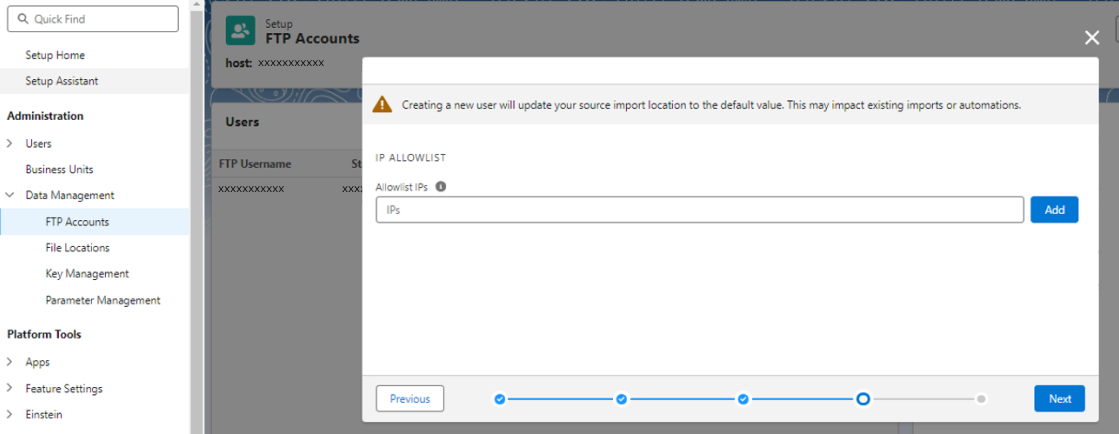
- Add IP Addresses if we want to allow only restricted IP’s. Click Next.
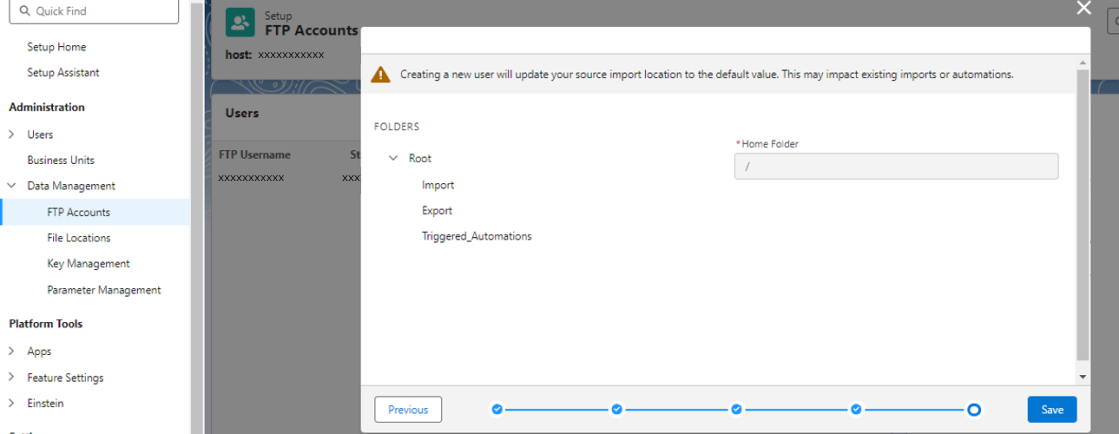
- Select folder to provide access to the particular folder or leave it with home folder (/). And press “Save”.
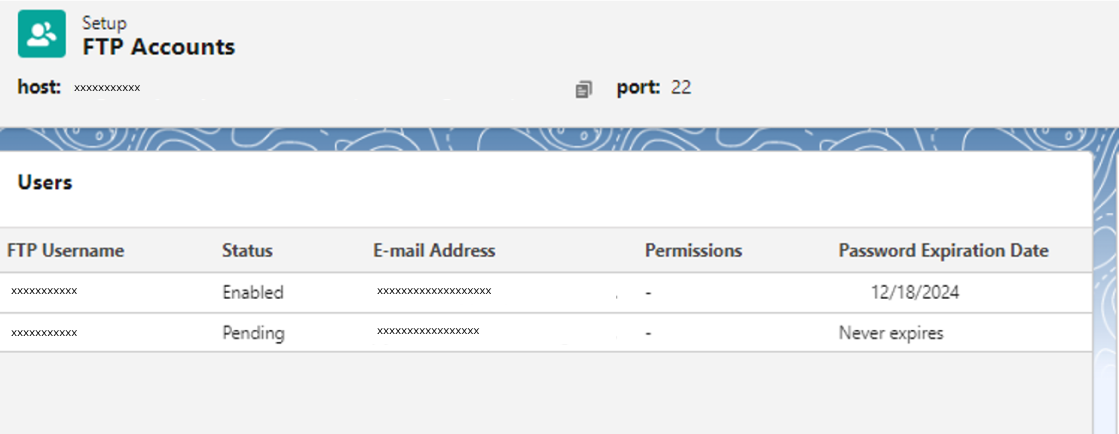
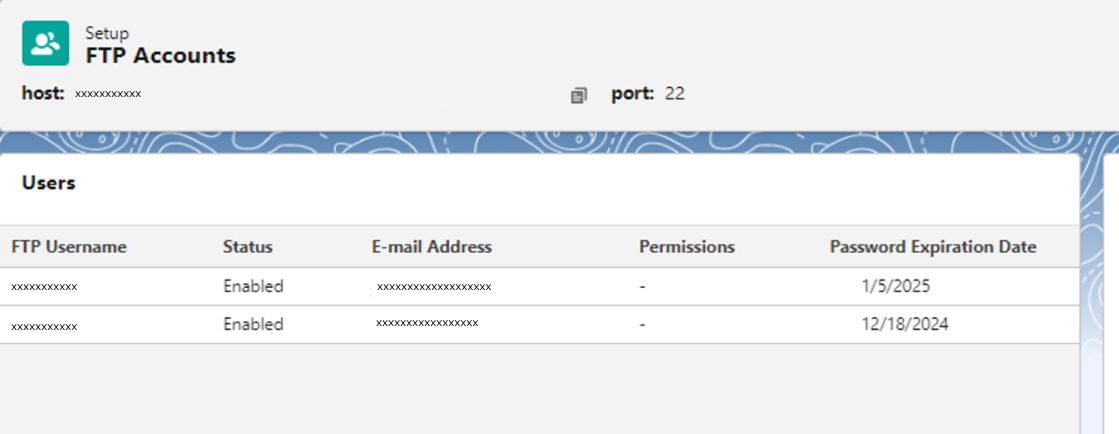
- Now FTP Account is created with status as Pending.
- After a few minutes refresh the page. The status will be changed to “Enabled”.
- Finally, your FTP Account is created.
2. File locations creation and configuration
Transfer files to and from Marketing Cloud Engagement using a file location with Enhanced FTP. Available locations are the import directory, export directory, a subfolder, or the Safehouse. Files stored in Enhanced FTP and the Safehouse are available for 21 days and then deleted.
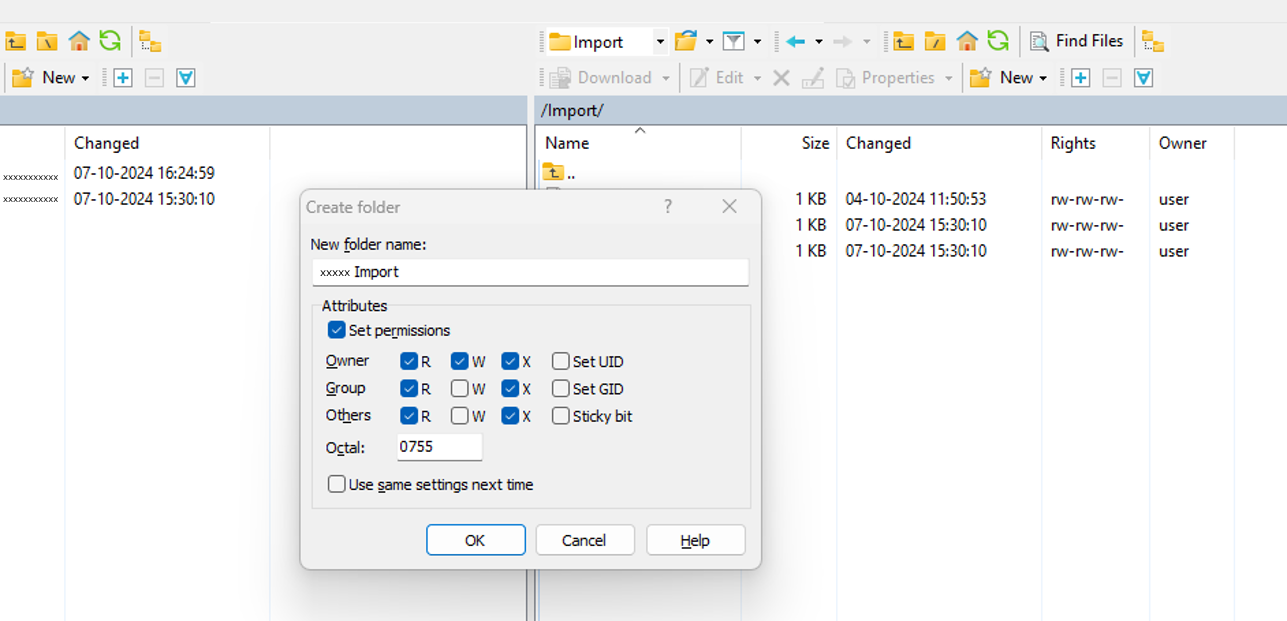
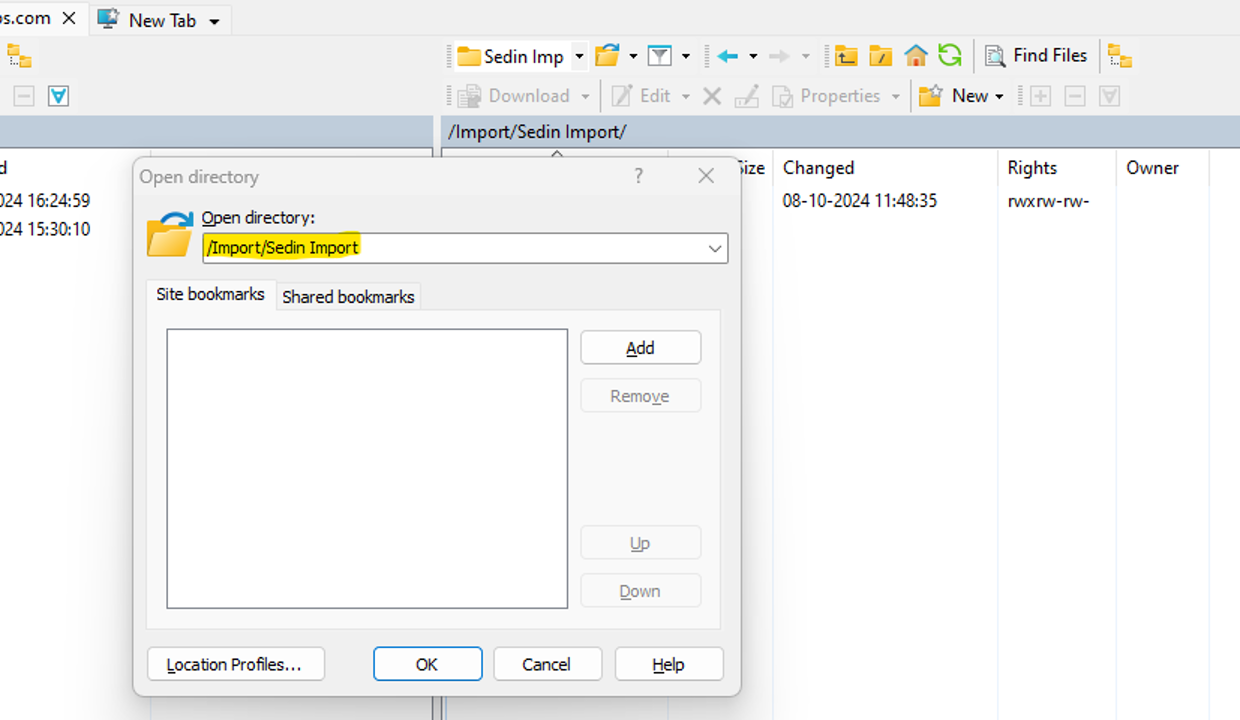
Procedure for Creating Directories in FTP Account
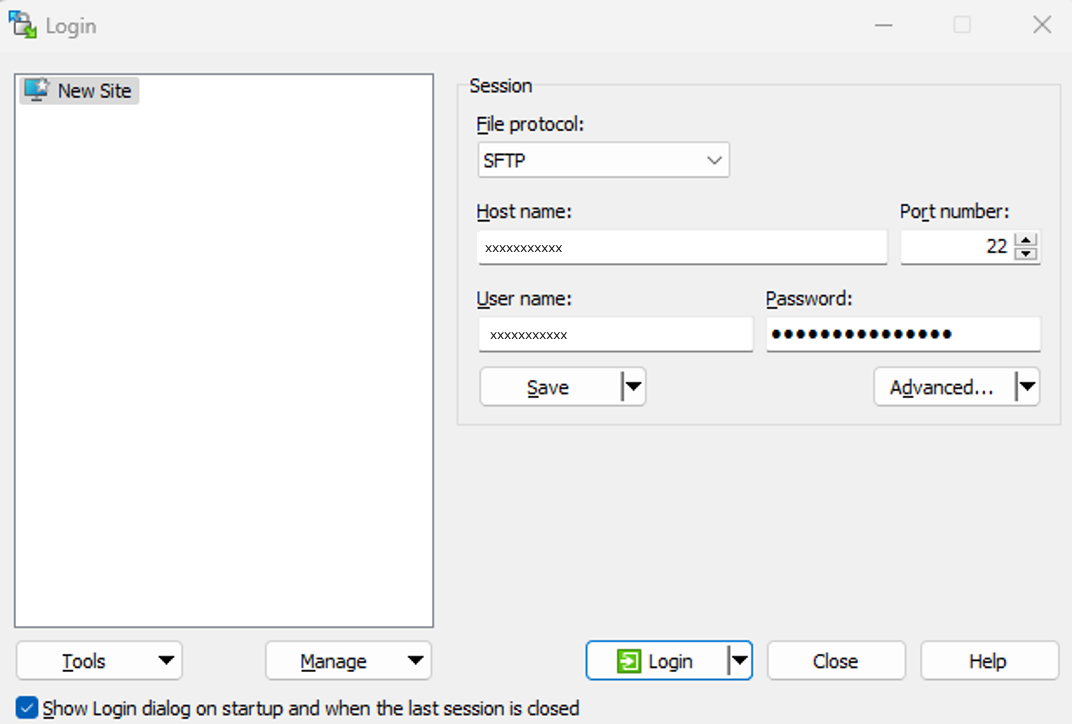
- Download WinSCP application to the device and install.
- Open the WinSCP Application and login with Host name, Username and Password.
- Host name can be found in SFMC FTP Accounts
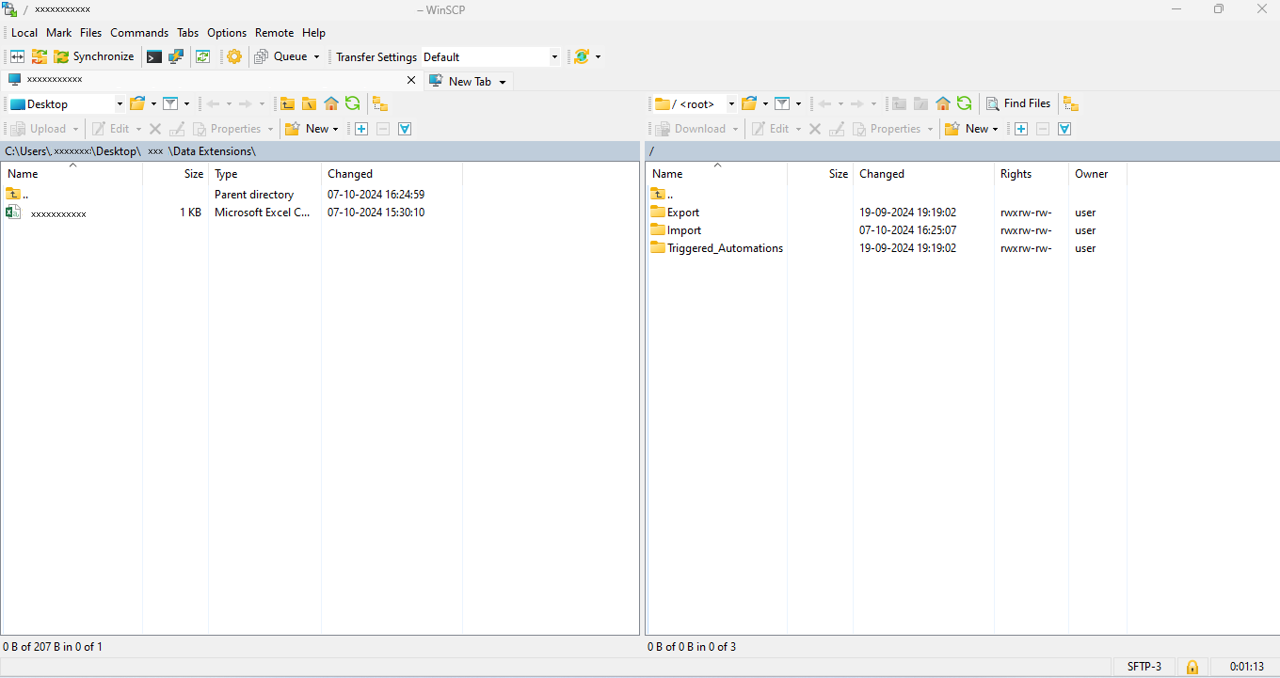
- You will be logged into FTP Server.
- Create a Directory (Folder) If required and set permissions. Click Ok.

Create a file location in Salesforce Marketing Cloud
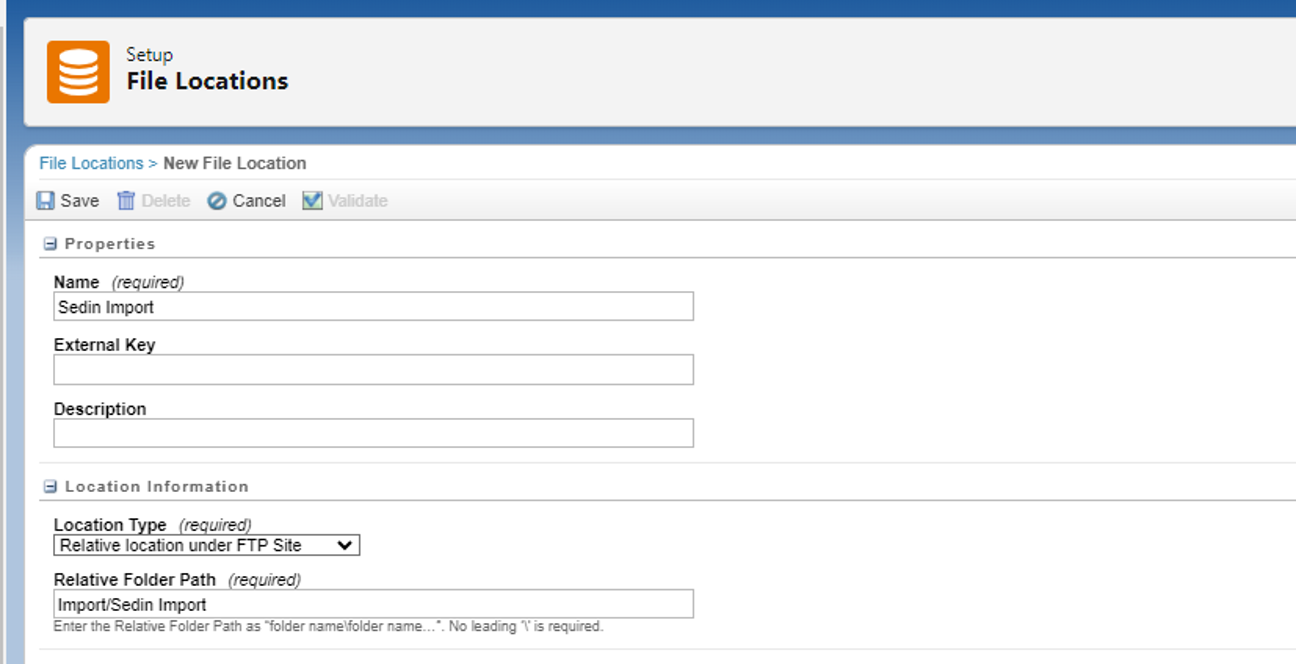
- Navigate to Setup, Data Management, File Locations.
- Click on Create.
- Give required Name and description.
- Select the location type.
- Now we are going with “Relative Location Under FTP Site”. Copy the path from FTP and paste it in “Retrieve Folder Path”.
- Click On Save.
- We have Setup the FTP Account and we created File Locations. It’s time to import data from FTP to Marketing cloud Engagement.
Step 3. Create File Drop Automation
The following are the steps to create a File drop automation to import files from FTP to SFMC:
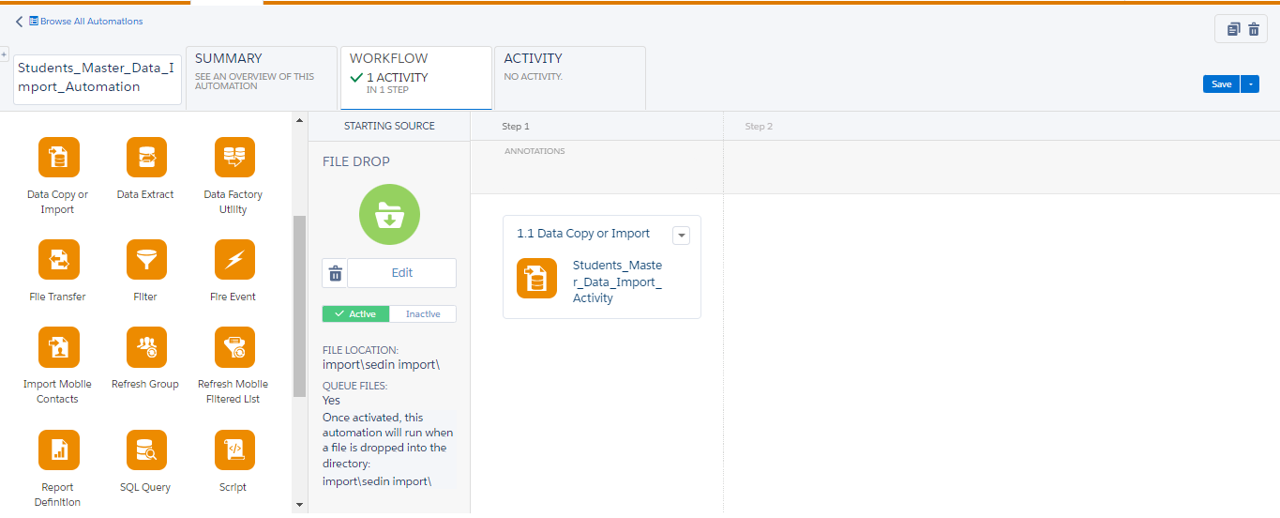
- Set up an automation that starts when a file is uploaded to the Marketing Cloud Engagement Enhanced SFTP.
- Create a Data Extension with required fields. And have data in CSV file which we need to import into Marketing Cloud Engagement.
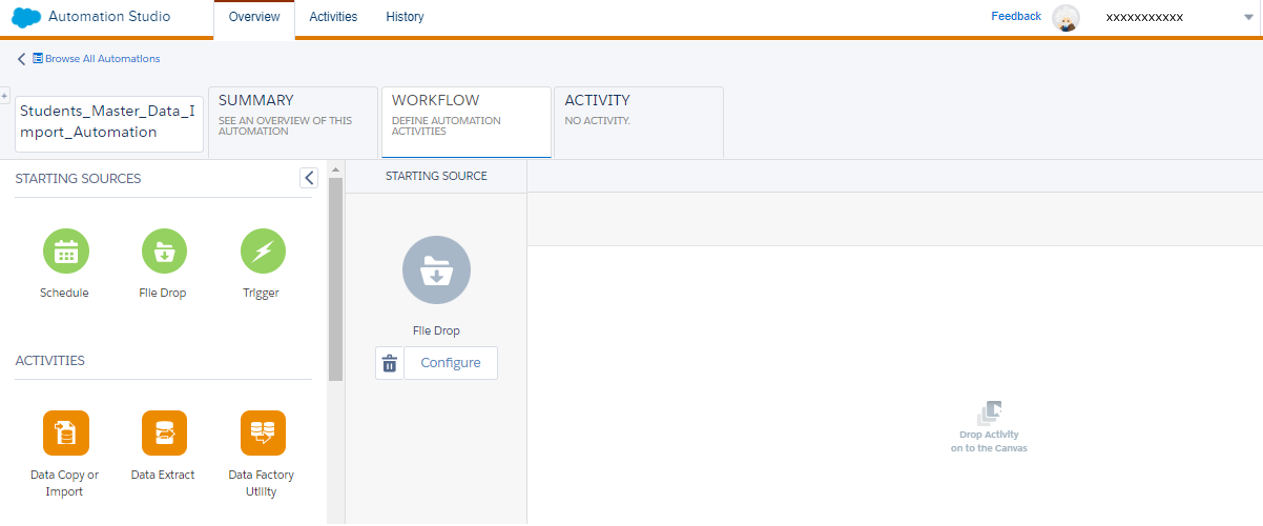
- Go to Automation Studio in Marketing Cloud Engagement. Click on New Automation. Drag File Drop as Starting Source. And Name the Automation.
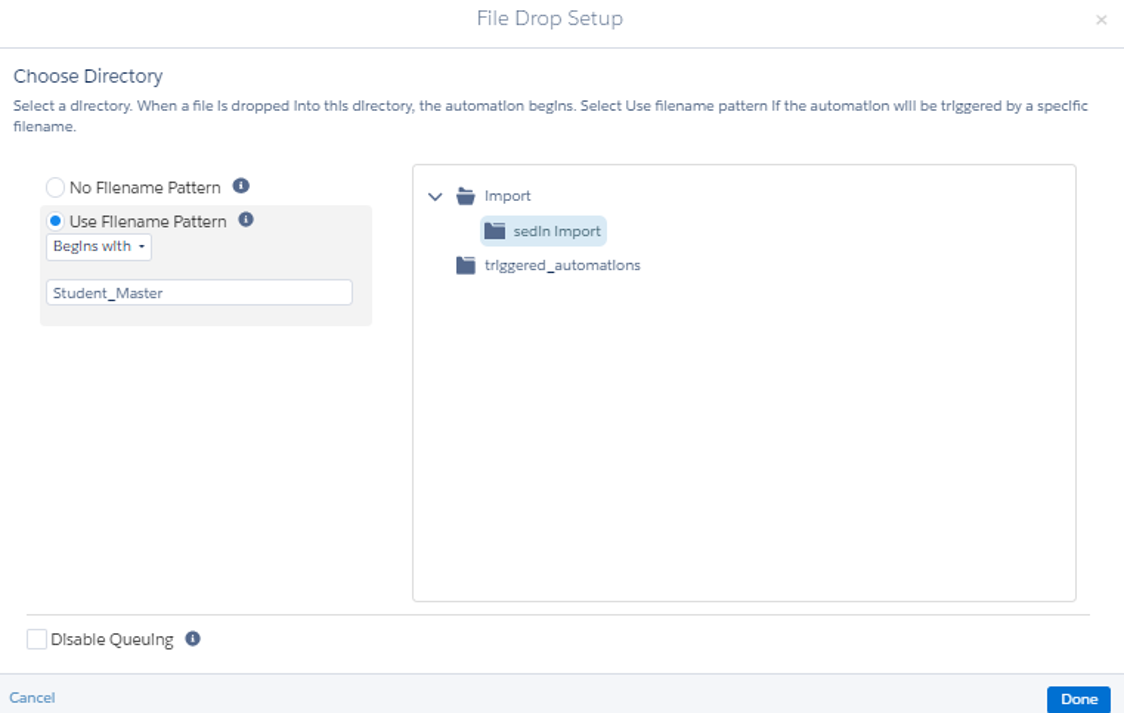
- Click on Configure. Choose whether to use a file
name pattern.
- If you’re using a file name pattern, select an operator and provide text for the pattern. Don’t include a file extension. If you select Contains, Automation Studio reads all files dropped into the FTP's Import or Triggered_Automations folder. It then triggers the automation tied to the first file it parses with a file name meeting the Contains criteria.
- If you select No Filename Pattern, assign a directory as a trigger for one automation at a time. Import, Triggered_Automations, or subdirectories of either can be used for this assigned directory.
- Now, go with the “Use Filename Pattern”. Select Contains/Begins with/Ends with and mention the file name accordingly. Select the directory which we created in STP server or we can use import or Triggered_Automations folder.
- File queuing is enabled by default. This means that when a running automation is completed, the next file in the queue begins the next automation.
- Select Disable Queuing for newly dropped SFTP files to be ignored while the automation is still running.
- Click “Done”.
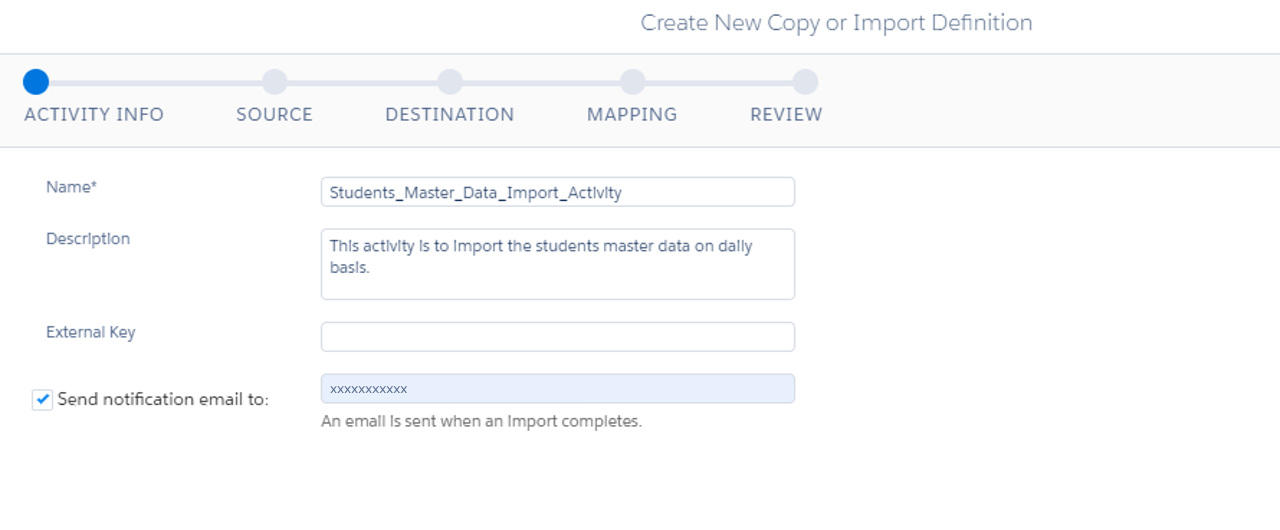
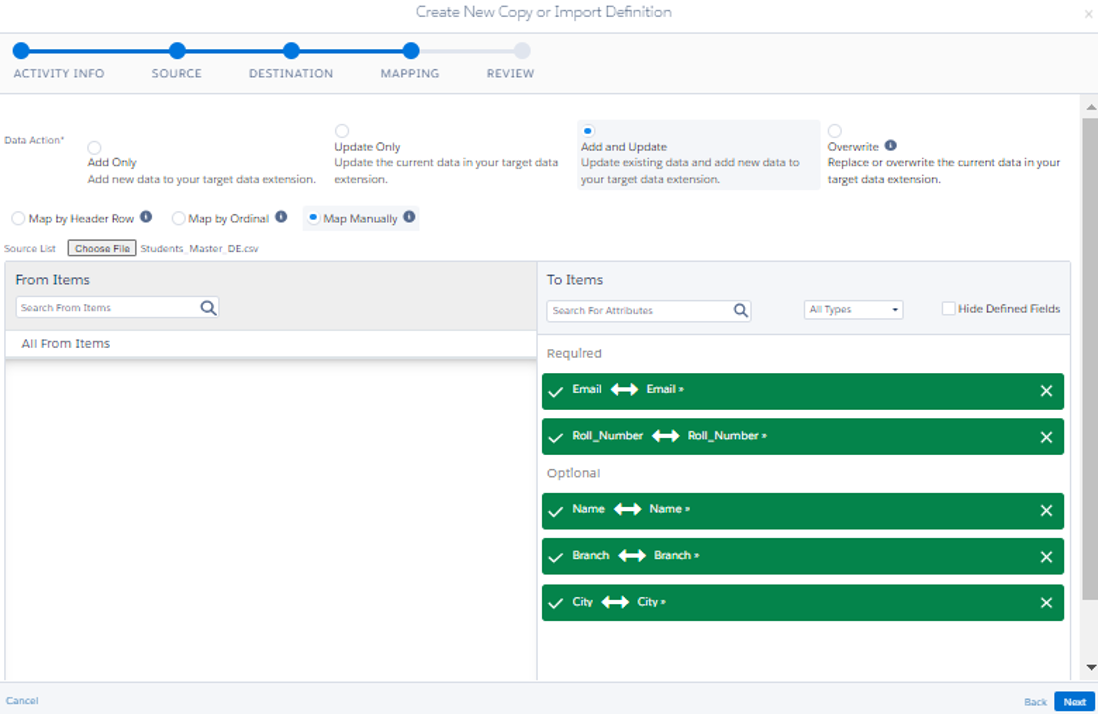
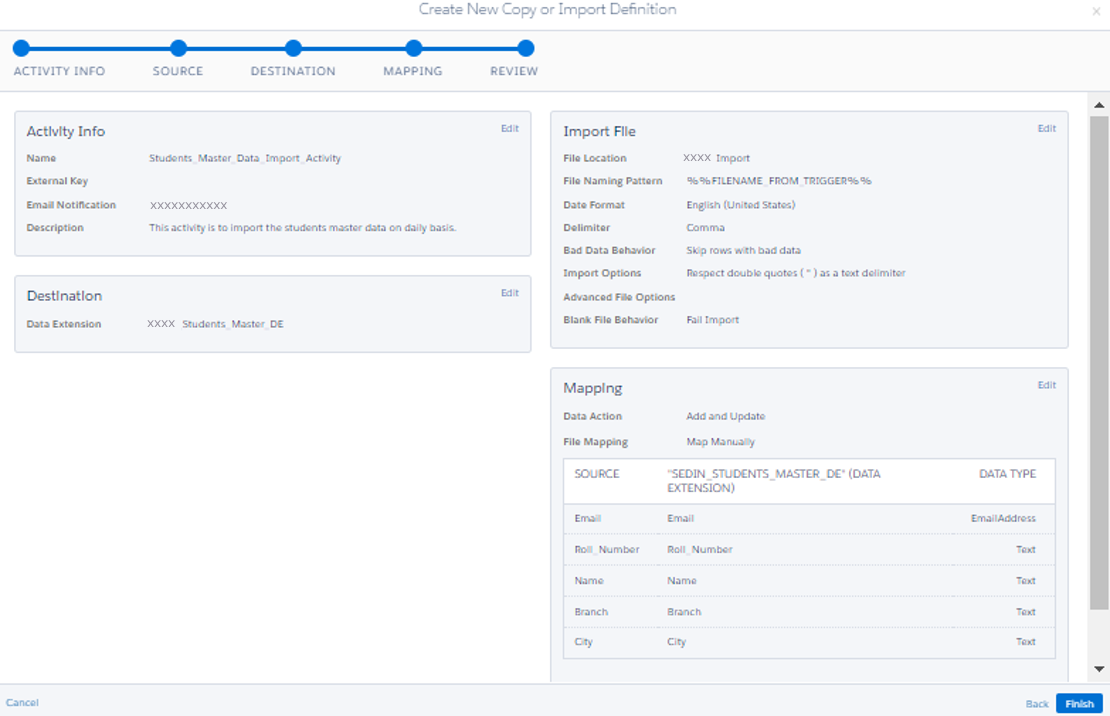
- Drag “Data Copy or Import” Activity to the Automation Canvas. Choose existing activity or create new activity. Now we are going with a new activity. Give name, description and external key. Add email address to send notifications about this activity. Click next.
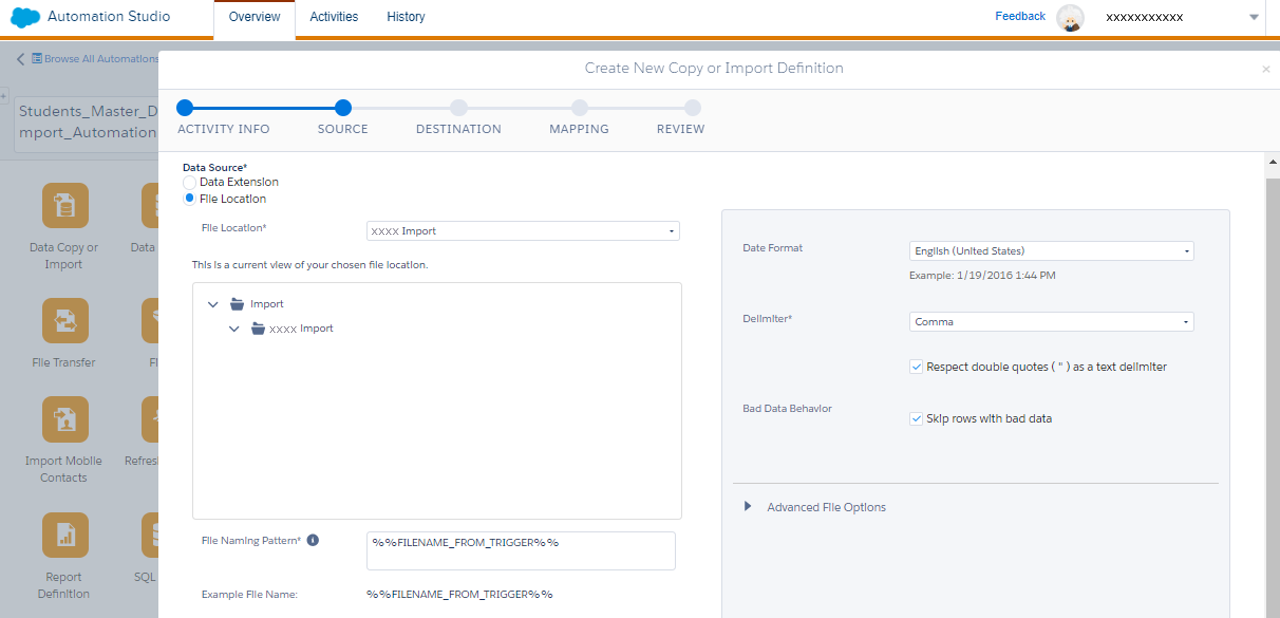
- Select Data Source as File Location. Choose the File Location. Set the file naming pattern.
- Use a filename pattern to allow any automation that is associated to it to run when a file whose name matches the pattern is dropped into an Enhanced FTP folder. Click Next.
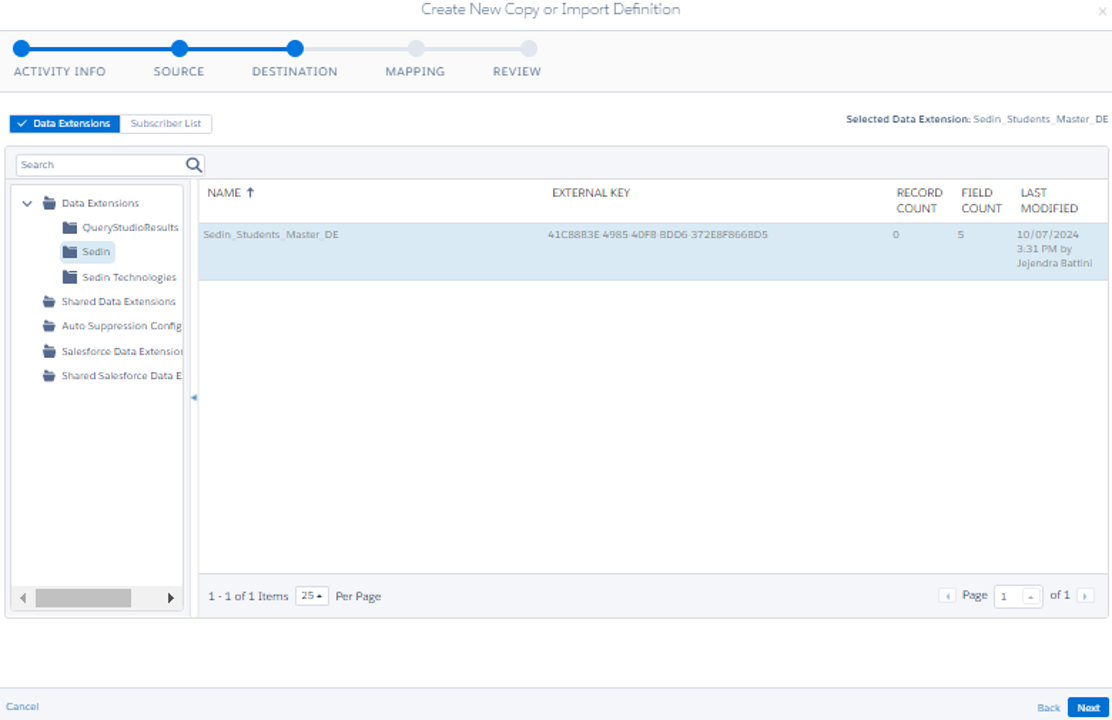
- Select the Data Extension to which the data is to be loaded. Click Next.
- Select Data Action, Map the fields and click next.
- Review the activity and click Finish.
- Save the Automation and activate it.
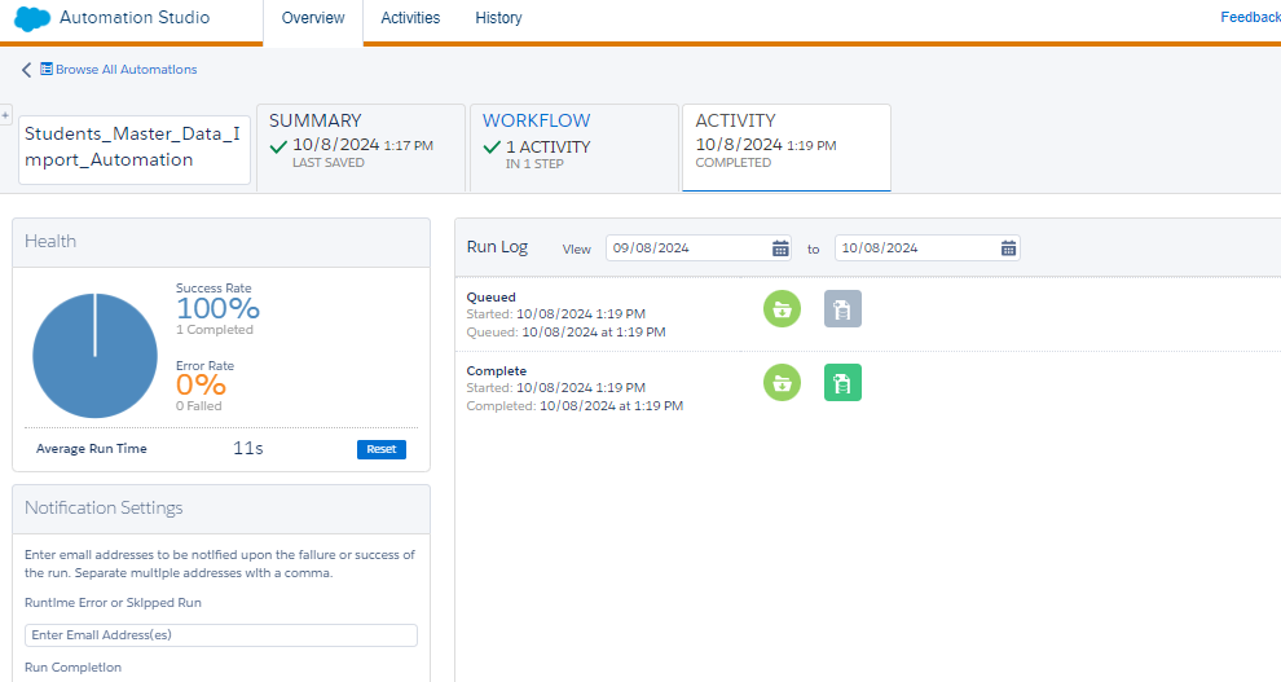
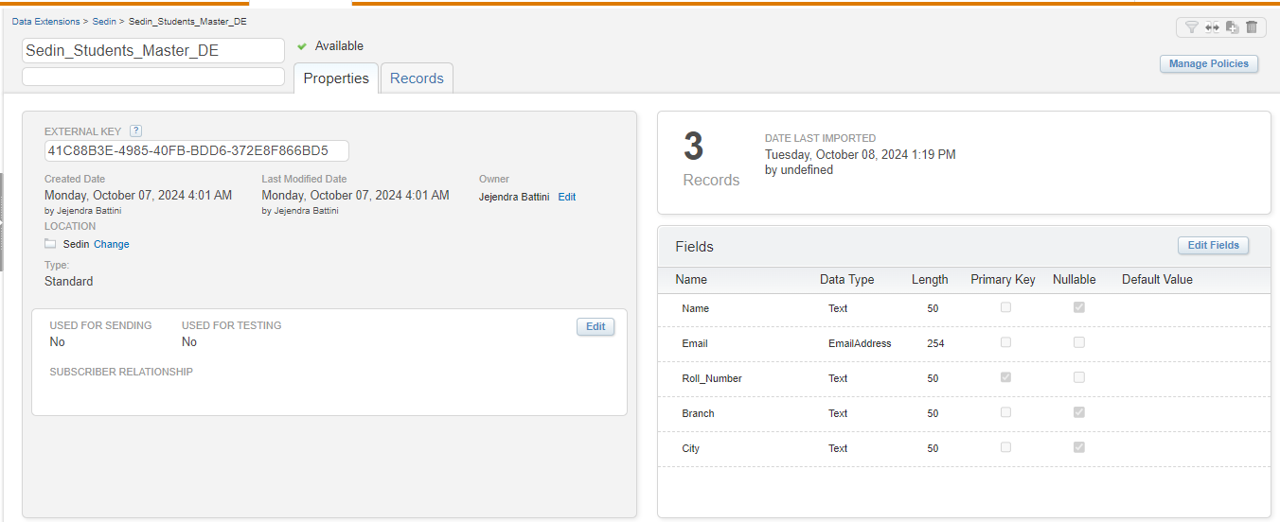
- Now whenever the file is dropped in the directory the automation will be triggered, and data will be imported to Data Extension.
- Automation will be triggered as soon as the file is dropped into FTP.
- Data imported to SFMC
Conclusion
As customer data continues to grow in volume and complexity, leveraging FTP in Salesforce Marketing Cloud isn’t just a convenience—it’s a powerful way to stay competitive and responsive.
Mastering FTP setup, file location creation, and automated file drop configurations in Salesforce Marketing Cloud opens up endless possibilities for smoother, more reliable data management. These steps aren’t just technical details—they’re foundational tools that help your marketing team focus on what matters most: crafting impactful, timely campaigns without being bogged down by manual data processes.
Embracing FTP automation in Salesforce Marketing Cloud empowers your team to move from reactive to proactive, always ready for the next big marketing opportunity. With a seamless data system in place, you’re not just keeping up—you’re setting the pace for success.
